


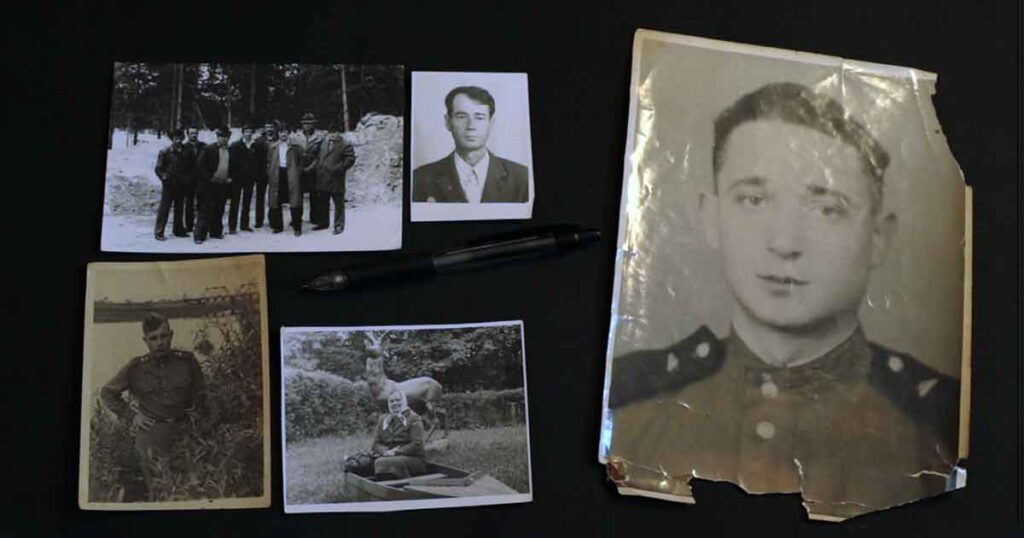
Create a Digital Photo Scan Without a Scanner At Home in 2026: Image Digitalization
Digitalization of the photo is the process of turning your physical printed photo into a digital image file, also widely known as “Photo Scanning“. Often done with scanners, cameras, or smartphones, Done in order to protect images from aging, to reprint them, or to share them online.
How to Scan Photos Using Your Phone: Short Step-by-Step Guide
Don’t want to spend time learning something useful? Don’t worry, we’ve got a quick, easy, and convenient step-by-step tutorial for you!
With Photo Scanning App
This is the simplest and quickest method. To scan these photos, you will just need one, a phone with a (relatively) excellent camera. After downloading the app, you will be able to create high-quality scans without having to purchase a scanner.
Here’s how it works:
- Look for “Photo Scanner App” in the App Store or Play Market.
- These apps are usually 100% free!
- Download app developed by Google (For iPhone or For Android)
- Open it and follow the simple and straightforward instructions provided inside the app
- Make a few scans, then choose the best one.
- Repeat it with any number of photos you have.
- Done!

It’s that simple; these mobile apps make the process simple, quick, and straightforward! App will do other work instead of you, and lead you through the entire process!
After this photo or photos you scanner should be in your gallery, now you can share them online or just have a digital copy in case you will ever lose your actual printed photo!
Without Photo Scanning App
If you can’t or don’t want to use apps for some reason, such as when using a DSLR camera, don’t worry; you can do it without them as well!
- Place your photograph on a flat surface.
- Hold your camera parallel to the surface.
- Choose a room with good natural lighting.
- Don’t take photo in a dark room
- Also avoid very bright light
- Try not to cast shadow over photo you taking
- Make sure your photo fills the majority of the frame without being cropped.
- Check that your camera is in focus.
- It will help to avoid blur
- Take a few photos, then choose the best one.
- Done!
Let’s check examples of good and bad photos taken this way!
Amazing, even though this approach is a little more difficult, it still allows you to achieve incredible results! These photos will not appear flat because they were not scanned, but you will get as close as you can without using a flatbed scanner!
This is all you needed to know to do it in the fast way, now, let’s learn more details, tricks and tips!
A short summary of what you will learn from this article:
- Everything you need to know in order to get the best-quality image scan
- How to digitize your photos without a scanner, with the help of your phone
- What is a bad scan, why are they bad, and how do I avoid them?
- How to store and share digitized images properly
We will start with the correct way to create digital scans of your photos. We will later share what bad scans are, since this information is important to know to get immaculate digital copies of your lovely photos!
Correct Way to Turn an Image into a Digital File
The correct way to scan photos is just a simple set of rules that you need to keep in mind while digitizing your images. With this information, you will be able to easily turn your paper photos into digital photos at home without any quality loss.
Digitize it With the Scanner
The best way to digitalize your images available in 2026 is to scan them with professional scanners. It can be your own scanner at home, at work, or at a local printing shop.
Resolution and DPI
The main specification that really matters is DPI (Dots Per Inch – the higher the DPI, the better the quality and resolution of the scanned image will be).
- Low DPI (100–300)
- Good DPI (300–600)
- Best DPI (600–1200)
If you can scan your image, nothing else is needed in order to get immaculate digital copies.
Digitize it With Your Smartphone Camera
Not every image can be digitized with the help of a scanner. There could be a lot of different reasons why, like no photo scanning service nearby or the fact that your image is impossible to scan, because:
- Image is stuck under the glass or in the album
- The photo is too old to take out of the frame or album
- Picture is part of the interior of the building or anything else
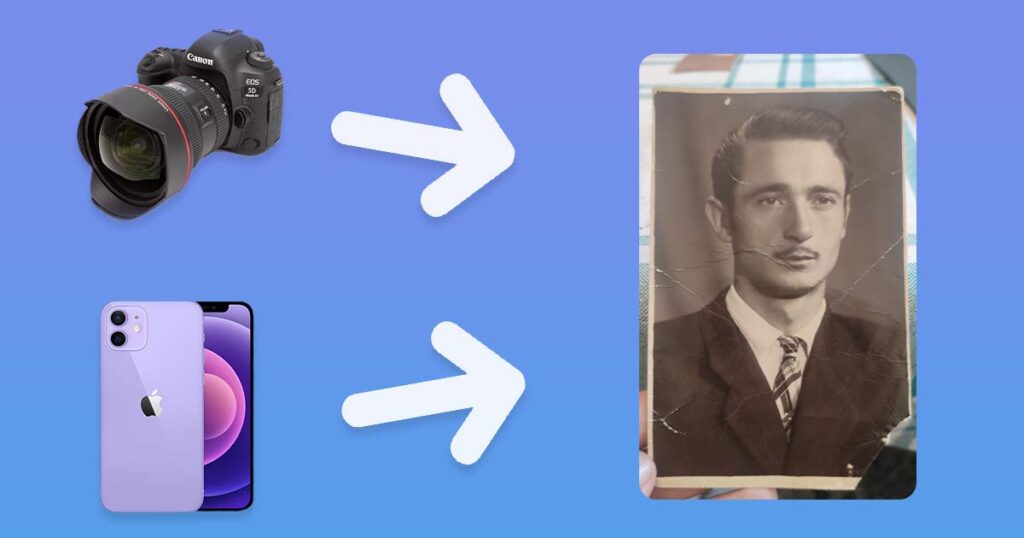
No matter the reason why you can’t scan your photos, you can still make digital copies of them at home with your phone. Please make sure you are using the best camera available for you. If you have both a smartphone and a professional DSLR camera, please use the second option.
Automatic Scan: Use a Mobile Photo Scanning App
The easiest, and often the best, way to scan your photos at home is to just download a photo scanning app to your phone. These apps are free, and most of them really do a great job at creating photo scans.
We will list the best ones that we found for both Android and iOS users.
iOS
Just download one or a few of these apps and try them. They are 100% free and easy to use.
- PhotoScan by Google Photos (4.8/5) Free
- Photo Scan App by Photomyne (4.7/5) Free
- Scanify Picture to Pdf Scan (4.5/5) Free
Android
These few apps are very easy to use and completely free. Try one or a few of them and find which one works best for you!
- CamScanner – PDF Scanner (4.9/5) Free
- Adobe Scan: PDF Scanner (4.8/5) Free
- PhotoScan by Google Photos (4.4/5) Free
Done
Here you can see an example of what your scan will look like after you scan it with any digital photo scanning app.

It is as easy as this. If you downloaded any of these apps above, they should have made your experience fast and easy, and now you should have perfect scans of your photos!
Manual Scan: Use a Camera
If for some reason you can’t use a photo scanning app, for example, when you take photos with your DSLR camera or your device is not supporting any apps, don’t worry; we have a solution for you too!
Here are steps on how to make an almost perfect scan with your smartphone or professional camera without using any apps!
Step 1: Place your photo on the flat surface
Make sure your smartphone or camera is parallel to the original image. Just put your image on a flat surface and make sure your phone isn’t tilted to any side.
If you are not sure how exactly to hold your camera, the easiest thing to do is just lay down your image, put your camera on top of it, and then just take your camera up without rotating it to the sides.
Avoid extreme angles
By “extreme angles,” we mean rotating or tilting the camera so much that the photo becomes distorted or stretched in scan. As a rule of thumb, the opposite sides of photos should appear the same size on a scanned photo.

If the side that is closer to you appears visually bigger than the opposite one, you are trying to take a photo from an extreme angle.
Step 2: Set up a good lightning
Lightning is very important when you’re trying to make a good scan. Professional scanners use bright light under that lid during the scan, which helps show all the details on the image.
Since a scanner is a perfectly balanced tool that is made to give the exact amount of light needed, it can be challenging to try and recreate it on your own, but don’t worry, we have a few good tips that will definitely help you.
Don’t use flash
Make sure that the flash on your phone or camera is disabled; otherwise, your digitized image will have a huge “stain” of light that burns away details from the original image.
Don’t use any hard or extremely bright light if possible; instead, try to use soft and diffused lights, like:
- Lamps
- Natural daylight
Or any other type of light available. If your source of light doesn’t have regulators to tune its strength, you can just correct its strength by moving it closer or further away.
Avoid reflections
This advice is often overlooked, and is closely related to lighting, so try to tilt or rotate your camera ever so slightly; it is often enough to get rid of reflections partially or completely.
If you have to choose between avoiding angles or avoiding reflections, better avoid reflections since they are basically “images” of you and your surroundings put on top of your scan, which makes it look bad.
Step 3: Make sure your camera is in focus and not moving
It is not that hard to avoid while taking the photo, but it is almost impossible to fix the quality loss caused by it later. A camera that is out of focus will cause blur, and that’s what you should avoid at all costs.
Avoid blur
If you need to pick between a reflection and a blurry photo, rather get the reflection, since blur is our main enemy.

Make sure your camera is in focus and not moving before taking a photo.
If you are using a phone:
- Click on your phone screen to focus the camera on a subject.
- Wait until the camera focuses.
- Retry a few times if it doesn’t work out.
As soon as the image is crisp and clear, press the button!
Done!
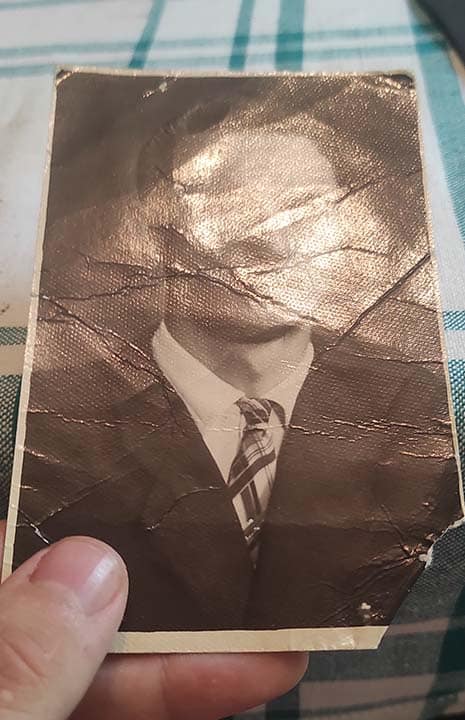
Here is example of a good photo scan that can be used!

Following these easy steps described above you should have an awesome digital copy of your images even without using any apps!
What About Bad Photo Scans
One step that separates your printed photos from being safe digital files is digitalization. If done incorrectly, the quality of the digital copy may be significantly lower than the original photo.
These problems may arise only if you scan your pictures using your smartphone instead of a professional scanner. So, if you can scan your photos this way, all possible issues will be resolved automatically.
What to Understand About Photo Scanning
When scanning a photo with the help of your phone, you should be aware of the following things.
Scanned photos will not have better quality than the originals
An image will not get better on its own because you digitize it, unless you use some kind of software or mobile app that automatically applies filters or uses AI to enhance the quality of scans.
Scan enhancement technologies and filters are relatively new and thus not very effective, so it is recommended to avoid any automatic enhancements.
If your photos have any type of damage, like cracks, creases, or anything else, these issues will also not get fixed automatically, and will need to be fixed separately with photo restoration.
Bad scan will look worse than original
Any mistakes made during digitalization will decrease the quality of the digital copy compared to the original printed copy. That’s the reason why copies of your photos that you will share online or decide to reprint later might have a lower quality than the original image.


To fix problems caused by poorly done image digitalization, you will need a photo restoration artist. Dealing with bad scans is equal to, or sometimes even worse than, dealing with scratches, cracks, and other damage.
So do everything you can to avoid this damage in the first place.
Consequences of wrong picture digitalization
Now that you know what effects wrong digitalization may have on the quality of your images, let’s check out the most common examples of digitalization issues:
Blurry Photos
The camera is out of focus. Blur is impossible to remove completely, only to decrease its strength; thus, it is the worst type of damage.
Extreme Angles
Photos taken from extreme angles will not only look distorted, but they will also be less detailed than those taken from a straight angle.
Highlights
If you are using your phone camera with flash enabled or a strong backlight, you will leave a “stain” of flash on top of your photo, and that light will burn out the details of this area completely.
Shadows
Similar to flash, shadows of your hand, phone, or body dark areas of the original photo, removing any details in shadow-covered areas.
Reflections
If your photo has a reflective surface, this means that the reflection it catches will be mixed up with the original image, thus ruining its details.
Now that you are aware of them, try to avoid all of the issues described above so your photos will look great. No worries, keep reading, and we will explain to you how to make your own perfect-looking digital copies at home!
Where and How I Should Store Photos?
Great! Now that your precious pictures are no longer at risk of being destroyed, you should still take care of how and where you store them. Although digital images can’t be physically destroyed, they can still be lost, erased by accident, or have their quality lowered unintentionally.

How to Avoid Losing My Digital Images?
There are quite a few ways in which you may lose or decrease the quality of your digital copies in just a few seconds. The good news is that it can be easily avoided, so here are a few rules to follow to never lose your precious photos.
Also, if you want to know how to store your physical printed photos, click the link.
Have multiple copies in different places
Have you heard the phrase “Don’t put all your eggs in one basket” before? This is actually a very valuable rule to know and follow with most things in life, and storing your photos is no exception.

All you need to be almost 100% safe when storing your photos is just two or more devices with memory, for example, a laptop and a smartphone with a connection to the internet. That’s it. With this, you can save your files in hundreds of places, making the chances of losing them nearly impossible.
Where to put digital copies of your pictures:
- Smartphone memory
- Cloud services
- Mega, Google Drive, Dropbox or iCloud
- Your PC’s built in hard drive
- External drives
- Any other device that has memory
The rule is simple: use any device available to you and store copies of your files on it. You have no limitations on the number of copies you may have; it is also completely free, so if you really treasure your files, have multiple copies.
Avoid photo compression
In 2026 as well as in previous years, websites did their absolute best to provide users with the best experiences. One of the most important measurements of user satisfaction is page speed.
Slow page loads are one of the main reasons users can never visit a website again or even open it in the first place. According to data from Wikipedia, every 0.1 second of page load speed causes around 5% of users to leave the page before it even loads.
The easiest and most productive way to make sure web pages load fast and phone data usage is optimized is to compress images.


Image Compression is the process of lossless or lossy optimization of the image by making pixels more condensed and using modern image file formats that will help to make the image file size smaller, with or without losing quality.
While image compression is generally good for providing you with the best possible web browsing experience, it should be noted that this often noticeably decreases image quality. The worst thing is that the process is recurring, so images can be compressed multiple times.
Have you ever seen an image in awesome quality and then seen the same image a few days later with half the quality, at best? This is what image compression may cause.
Where I will encounter image compression?
Good thing is that this is very easy to avoid, just make sure you don’t share or store photos you want to have 100% quality on following websites.
- Social media
- Especially Instagram, Facebook and Twitter
- Online shops and marketplaces
- Amazon, Aliexpress, Etsy etc
- Blog posts
- Messengers
- Telegram and WhatsApp
- Random websites
Some of these websites or apps can still be used to store photos without compression, but you need to know where and how. For example, Telegram compresses all the images that are shared by default, but you can disable it or intentionally share a particular image without compression.
Safe places to store photos without photo compression
This is pretty much the same places we recommended you above, b
- Your smartphone storage
- Cloud File Storage Services
- Mega, Google Drive, Dropbox or iCloud
- Your PC built in hard drive
- External HDD, SSD or flash drives
This is everything you needed to know to be sure that your files will be stored safely, in full quality, and forever! Now, let’s continue.
What to Do Next With Digitized Images?
Now that you have your images in a digital format, share them, reprint them, or just have them safely stored in cloud storage or on any other device you have, so they will be forever protected from being lost!
Still Need Help?
If you followed all those instructions and your photos still don’t look right, chances are that the problem is not with the digital copy you created but with the original photo you digitized.
What if Your Photos Look Damaged
Please take a closer look at the image that you have digitized; if it has any scratches, stains, or any other type of damage, please don’t try to fix it on your own because you risk damaging it even more or just destroying the photo.
We Can Help
We are a professional photo restoration service that focuses on restoring your images to perfection. It doesn’t matter how old and damaged they are; we can improve almost any photo we work with.
If you are interested, feel free to contact us with the help of the chat on the bottom right corner of the page, get a free quote, or learn more!
Get a Free Quote
✔ Professional Photo Restoration
✔ Fast Delivery (1-4 Business days)
✔ Low Price Without Taxes or Fees
✔ Unlimited Free Revisions
✔ Satisfaction Guarantee
LEARN MORESubscribe to Newsletter

How To Store Old Printed Photos and Avoid Damage
Do you have some precious printed photos? Let us explain [...]
Jan
Does Walgreens Still Provide Photo Restoration Services?
Walgreens is a well-known pharmacy chain that offers old photo restoration services. [...]
Apr
How to Colorize Black and White Photos Using AI for Free – 2026
Want to learn how to colorize your black and white [...]
Jun
How To Colorize Black & White Photos: Photoshop Tutorial 2026
Detailed tutorial to teach you how to colorize your black [...]
Jun
AI vs. Photo Restoration Services Compared: Which is Best for My Old Photos?
Compare photo restoration AI and professional services side-by-side. Uncover the [...]
Jun
How Much Does Photo Restoration Cost? Factors That Affect Pricing
Wondering how much photo restoration costs? Prices can range from [...]
Aug
What is Photo Retouching and How is It Done? Complete Info 2026
What is Photo Retouching? Why and how do people do [...]
Jan
How to Pick the Best Online Photo Restoration Service?
Are you looking to restore old and damaged photos? We [...]
Jan
5 Benefits of Old Photo Restoration: Protect Your History
Do you want to explore the history of your family? [...]
Jan
What is Photo Restoration and How Does it Work? 2025
Want to know what photo restoration is and how does [...]
Dec
Photo Restoration in Preserving Family History and Memories
There's no denying the sentimental value of photographs. They capture [...]
Jan
Types of Damage for Photo Restoration: What Can Be Restored?
Learn everything you need to know about types of damage [...]
Jan