How to Keep Your Printed Photos Safe From Damage
As digital photography becomes more and more prevalent, it’s easy to forget the simple joy of holding a physical photograph in your hand. There’s just something special about being able to look at a picture and remember a moment in time, without having to squint at a screen or scroll through endless feeds.
But with great joy comes great responsibility – or, in this case, the need to take good care of your printed photos. Whether you’ve got a stack of old family pictures that you inherited, or you’re a photographer looking to preserve your work, here are some tips for keeping your printed photos safe and sound.
Store Your Photos Properly
This section will teach you everything you need to know to ensure that your photos are safe from damage! The first step in protecting your photos is to make sure they’re stored correctly. This means:
1. Use Special Albums or Boxes
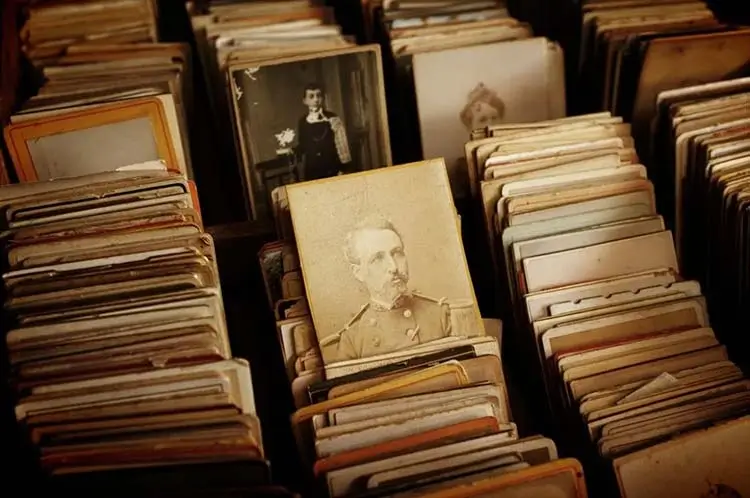
The most popular cause of photo damage is stacking photos on top of each other inside the box, where they are lying on top of each other and can easily damage other photos in the box.


Even worse if this photo is just lying somewhere else, like on the shelf. The best thing you can do is invest and buy a good-quality photo album or box to store them vertically.
Storing them vertically is very important, since this way, they don’t scratch and damage photos nearby.
2. Keep Pictures Out of Direct Sunlight
Ultra violet (UV) rays can fade and discolor your photos over time, so it’s best to keep them in a cool, dry place that’s not exposed to direct sunlight.
3. Avoid Extreme Temperatures
Both high and low temperatures can damage your photos, so it’s best to keep them in a room that’s kept at a moderate temperature.
4. Keep them away from moisture
Humidity can cause your photos to stick together, while water can cause them to wrinkle or even dissolve. So it’s best to store your photos in a dry place, away from sources of moisture like bathrooms and basements.
Photos dislike both cold and hot temperatures, but hot temperatures are especially dangerous. It can cause your photographs’ paint to melt, causing surface cracking, and so on.
5. Use acid-free materials
Many older albums and photo boxes are made with acidic materials that can yellow and deteriorate your photos over time. To protect your photos, look for acid-free albums and storage materials.
Handle Printed Photos Carefully
It’s easy to forget just how delicate printed photos can be – after all, they’re just pieces of paper. But it’s important to handle them gently to avoid damaging them. Here are a few tips:
1. Don’t Touch the Surface of The Photo
The oils on your skin can leave marks and smudges on the surface of the photo, so it’s best to handle them by the edges or the back.
2. Don’t Stack Them
It was mentioned above, but it is very important. If you’ve got a pile of photos, don’t just stack them on top of each other. The weight of the photos on top can cause the ones on the bottom to become creased or bent. Instead, try using photo folders or photo boxes to keep them organized.
3. Don’t Use Paper Clips or Rubber Bands
These can leave marks or indentations on your photos, so it’s best to avoid them altogether. Instead, try using photo corners or acid-free paper to keep your photos organized.
Scan Your Photos (Image Digitalization)
Digital copies are your friend. Even if you take all the precautions in the world, accidents can still happen. Photos can get lost, damaged, or destroyed – and when that happens, it can be heartbreaking. That’s where digital copies come in.
- Unlimited ability to copy photos
- Share them anywhere, anytime
- These photos can’t get physically damaged, lost or destroyed
- Easy access anywhere, anytime
A Few Steps to Create Digital Scans At Home
You can create digital scan at home, even if you don’t have a photo scanner! The only thing you need is your smartphone with more or less decent camera!
0. Use any free Photo Scanner App
Simply search the App Store for “Photo Scanning App” to find a plethora of options. They all work exactly the same and should be completely free, with the exception of ads.


Most of these apps will walk you through the entire process, so all you have to do is follow the instructions and you’re done with great quality photo scan!
If for some reason you can’t use any of these app, no worries, we also have a manual way for you!
1. Place your photo on a flat surface
Place the photo to be scanned on top of the flat surface. Make sure your room has adequate lighting so that the photo is not too dark to see, nor is it too bright so that the photo flashes or has reflections.
The camera shouldn’t be too far from the photo. You don’t need much empty space around the photo.
Don’t move the camera so close that it will crop details out of the image or make your camera lose focus.
Don’t take photos from an angle. Make sure your camera isn’t tilted or rotated.
2. Set up your smartphone camera
Turn off your camera’s flash. Because it either creates a bright “stain of light” or makes your photos more reflective than usual, the flash is not ideal for digitizing your images.
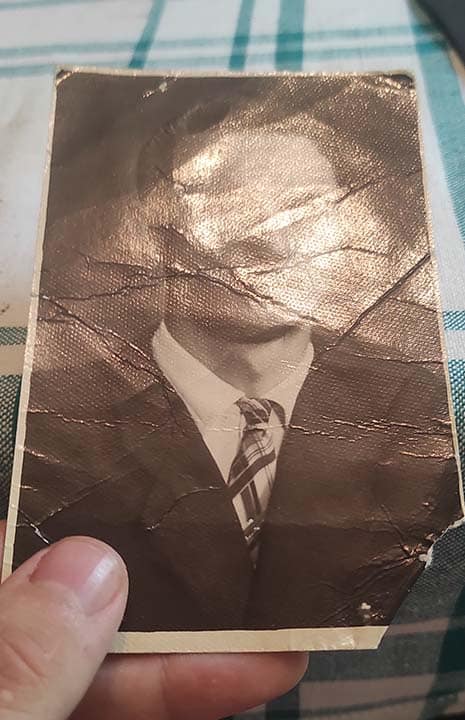
Here is an example of heavily flashed photo.


As you can see, the flash has washed out the majority of the photo, leaving only a pure white stain in place of any original details. Avoid it at all costs.
3. Make sure your camera is in focus
If you do not check whether your camera is in focus before taking the photo, the final image will be blurry. Blur is one of the worst types of damage you can do to your photo because it is nearly impossible to remove the blur, only to reduce the severity of the problem.
Here is example of what blurry photo that considered blurry.


It is frequently very simple to avoid. Simply tap your phone’s screen a few times on the area of the photo you want the camera to focus on.
4. Snap a photo
That’s all there is to it!


The photo will not be as good as if it had been scanned by a professional scanner or even a photo scanning app, but it will suffice!
Digital copies are your friend
By scanning your photos and creating digital copies, you can create a backup that can be stored on your computer or in the cloud. That way, even if your physical photos are lost or damaged, you’ll still have a copy that you can access anytime.
What to do With Photos That Already Are Badly Damaged?
If photos are already damaged, and this type of damage can’t be easily reverted – don’t worry, there is still few things you can do in order to save and restore damaged photos.
Try To Restore Them At Home
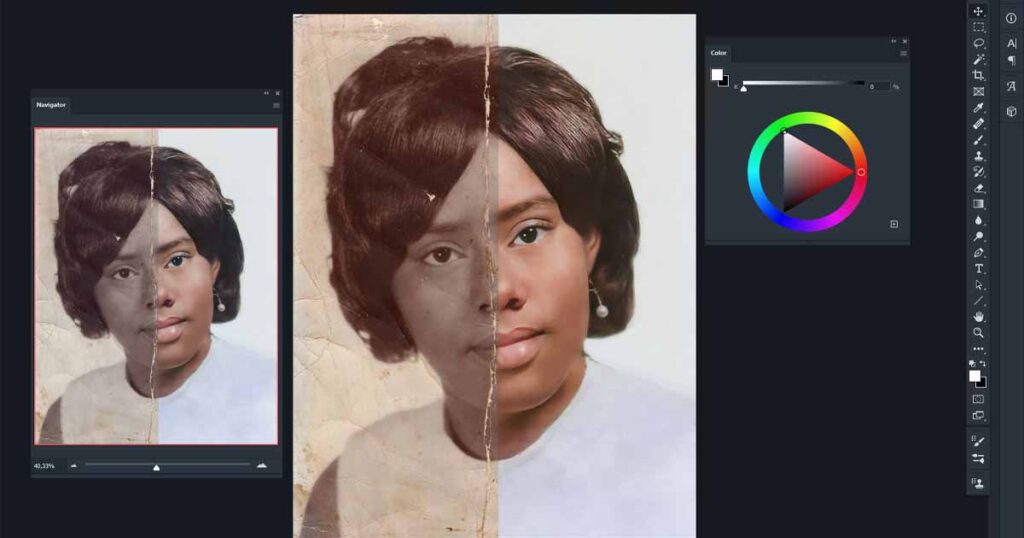
It strongly depends on the level of damage your photos have, but, in some cases you can restore your photos at home, using free digital tools and our step by step tutorial!


Here is very short version of steps you on restoring your photos for free, at home in 2026:
- Digitize your photos
- Transfer them to your computer
- Open Photoshop or Photopea (free analog of photoshop)
- Open your image in this software
- Crop your image using Crop Tool or Perspective Crop tool
- Create new layer on top of the original image
- Use Clone Stamp or Spot Healing Brush tool to restore damaged pixels with “healthy” parts of picture
- Pay special attention to facial details
- Use Curves Adjustment layer to improve colors and tones of your photos
- Remove any “suspicious” bright or dark areas of the photo with the help of Curves and Exposure Adjustment layers
- Save your PSD file
- Save and export image either as JPG or PNG
- Done
Again, we would strongly recommend you to read the full article if you need everything to be step-by-step!
Can’t Fix Your Photos on Your Own?
Photo Restoration is difficult to do without any prior experience. In case if you can’t or simply don’t want to pick a new skill, it will be great idea to contact professional photo restoration service.
Get Your Photo Restored for You by Professionals
Printed photos may not be as popular as they once were, but they still hold a special place in our hearts. By taking good care of your photos and knowing how to restore them when they become damaged, you can preserve your memories and keep them alive for generations to come.
In case if you can’t restore these photos from damage on your own, and looking for a professional service – we are here to help! Get a free quote with detailed and honest answer from us about what can or can’t be done to your photos!
Get a Free Quote
✔ Professional Photo Restoration
✔ Fast Delivery (1-4 Business days)
✔ Low Price Without Taxes or Fees
✔ Unlimited Free Revisions
✔ Satisfaction Guarantee
LEARN MORESubscribe to Newsletter


AI vs. Photo Restoration Services Compared: Which is Best for My Old Photos?
Compare photo restoration AI and professional services side-by-side. Uncover the [...]
Jun
FAQ – Photo Restoration and Colorization Services
Do you have any questions about your old photographs? This [...]
Aug
What is Photo Resolution Enlargement and How Does it Work
Learn everything you need to know about photo resolution enlargement. [...]
Jan
20 Stunning Photo Restoration Examples: Before & After Gallery
Discover 20 Stunning Examples of Photo Restoration, showcasing amazing transformations [...]
Sep
Can AI Really Restore Old Photos? 2026
Can AI really restore your photos at home, without any [...]
Dec
How to Colorize Black and White Photos Using AI for Free – 2026
Want to learn how to colorize your black and white [...]
Jun
How to Pick the Best Online Photo Restoration Service?
Are you looking to restore old and damaged photos? We [...]
Jan
Blurry and Out-of-Focus Images: A Guide to Photo Restoration
Have you ever taken a photo that you were really [...]
Jan
Types of Damage for Photo Restoration: What Can Be Restored?
Learn everything you need to know about types of damage [...]
Jan
How to Digitize Photos With Phone at Home? Easy Guide!
Do you have photos and want to make them into [...]
Dec
Why Should You Restore Old Photos?
Found some old and damaged photos at home? Not sure [...]
Dec
Old Photo Restoration Tutorial 2026 – Easy Photoshop Guide
Did you find some old and damaged photos at home? [...]
Dec