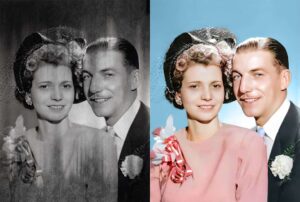


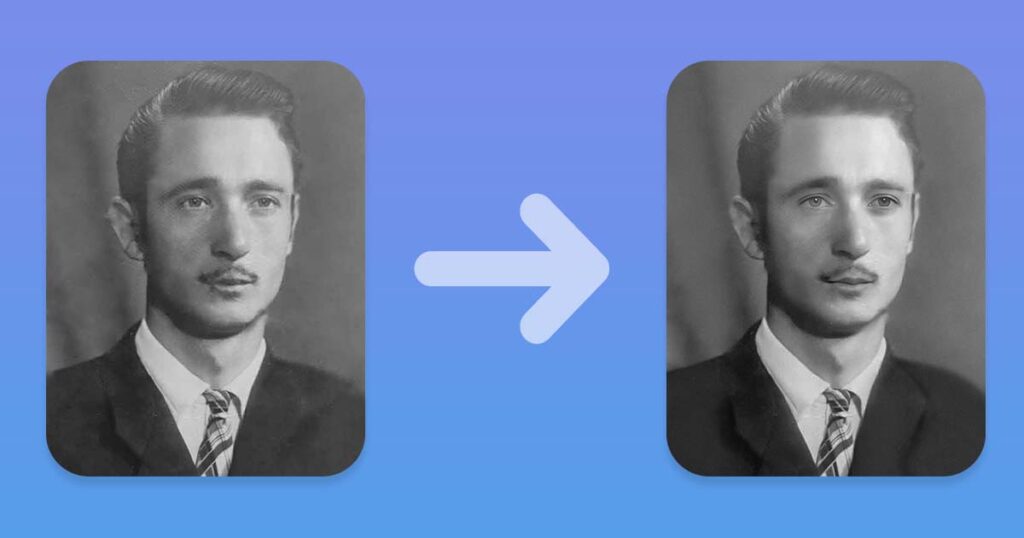
How to Restore Old Photos with Photoshop in 2026 at Home
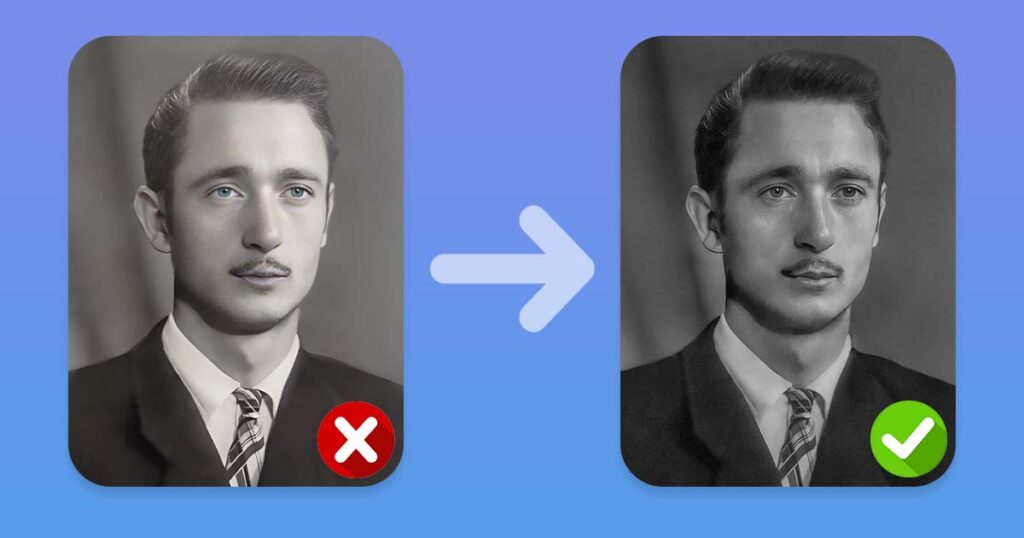
Photo restoration is the process of repairing old and damaged photographs so that they appear new and undamaged. This guide will assist you in restoring your photos at home on your own.
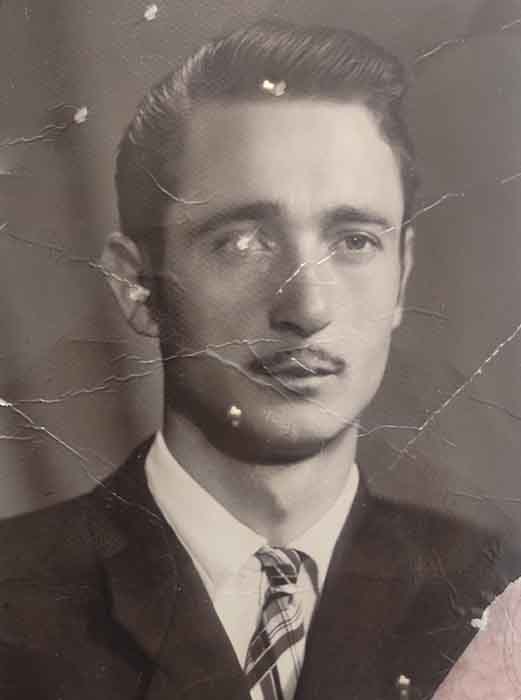
Have you discovered a box of old photographs, capturing treasured memories from the past, only to find out that they had been damaged or nearly destroyed over the decades of storage?
Don’t worry, with the power of Photoshop, modern technology, and a little effort, you will be able to restore almost any type of damage to these old photos, making them look as if they were never damaged. You’ll discover how to effectively repair any damage these photos may have!
In this article you will learn how to repair photos that have minor to moderate level of the damage. The greater the degree of damage to a photograph, the less likely it is that a novice will be able to successfully restore it, making it attractive and nearly as original.
But don’t worry, the skills you learn here will be applicable to any photo repairs you do, so even if your original photo was terrible, it will be much better after you fix it, even if it isn’t perfect!
You will learn:
- How to import and export the image to or from Photoshop
- How to use Photoshop tools non-destructively
- How to restore and colorize old photos at home
- A lot of small tips and tricks
How Can I Restore my Photos at home?
To answer this question we have created this detailed photo restoration tutorial that will walk you through the entire process step by step. It is written by an experienced photo restoration artist, so you will gain firsthand knowledge of how it works.
It may be a little overwhelming because this topic is both interesting and difficult to learn, but we will do our best to make it as simple as possible for you!
This article is:
- Adapted for absolute beginners
- Written by a skilled photo restoration artist
- Provides a lot of information about the topic
- Well provided with images and explanation
- Updated and relevant in 2026
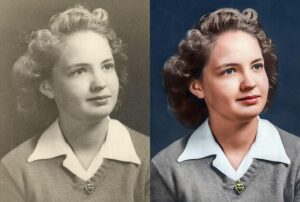
If you want to learn how to colorize black and white photos at home just click this link instead. You might be interested in learning more about the capabilities of AI Photo Colorizers. Anyways, we will do our best here, to give you everything you need to know about photo restoration at home!
Old Photo Restoration Tutorial with Photoshop in 2026
Photo restoration is the process of repairing and enhancing old or damaged photos to make them look new and undamaged again. While it is possible to restore photos on your own at home, the more damage the photo has, the less likely you will be able to restore it successfully. This guide will help you to restore your own photos at home using Photoshop, although similar techniques can also be used with other photo editing software.
0. Digitize your images
The first step in the photo restoration process is to digitize your images. Image digitalization, also referred as image scanning can be done in multiple way, so don’t worry if you don’t have a professional scanner at home, we will sort thing out.

There are two main options for digitizing your images:
Scan the photo using a high-quality scanner
If you can use scanner – do it, it will make the process easier, and often create higher quality scans. This will produce a digital version of the photo that can be edited on your computer. Make sure to use a scanner with a high resolution setting to capture as much detail as possible.
Use photo scanning app
After using a high-quality professional photo scanner, the next best option is to use a smartphone photo scanning app.

More information can be found in the article about photo scanning with a phone. To summarize, there are numerous good apps to choose from, so simply:
- Navigate to the App Store or Play Market
- Look for “Photo Scanning App” on Google
- Check for reviews (but don’t get stuck here)
- Download one or more of these apps and give them a shot
Because they are free, you can try several and choose the one you like best!
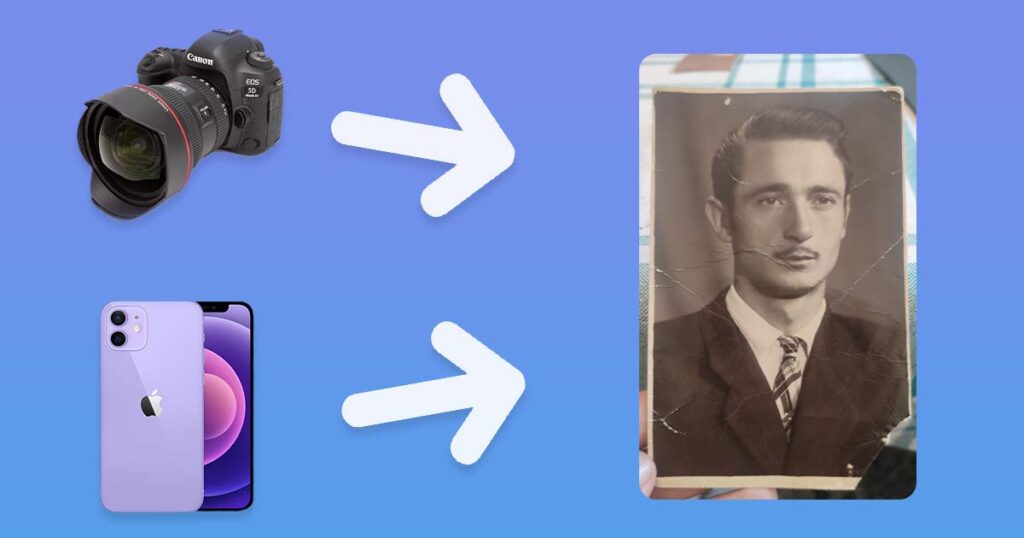
Take a photograph of the physical photo with a high-quality camera
If you don’t have access to a scanner, this can be a convenient option, but it’s critical to use a good camera to capture as much detail as possible. Simply try to use the best camera that is currently available to you; here are a few suggestions in descending quality order:
- DSLR camera
- Smartphone camera
- Action camera
These are the best options for photographing a photograph. If you don’t have any of these, it is recommended that you go to a printing shop to scan the photo because using a webcam to scan the photo is not the best idea.
To get the best results, try to:
- Avoid blur
- Shadow or highlights
- Shooting at an angle
- Cropping during the digitalization process
These problems can be difficult to resolve later, so it’s best to avoid them if at all possible. The higher the quality of the digital scan, the higher the quality of the restored photo; don’t lose quality during digitalization, as a low quality scan can be even more damaging to restored photo quality than actual physical damage to your image.
Make several attempts
Instead of attempting to make a perfect scan on the first try, it is better to make as many copies as possible and then choose the best one!
What if you have multiple photos?
If you want to scan and restore multiple photos, it is still critical to digitize them separately. This ensures that each of these photos has the best possible resolution and overall quality.
1. Transfer the Image to Your Computer
Once you have digitized your images, you’ll need to transfer them to your computer so you can start the restoration process.
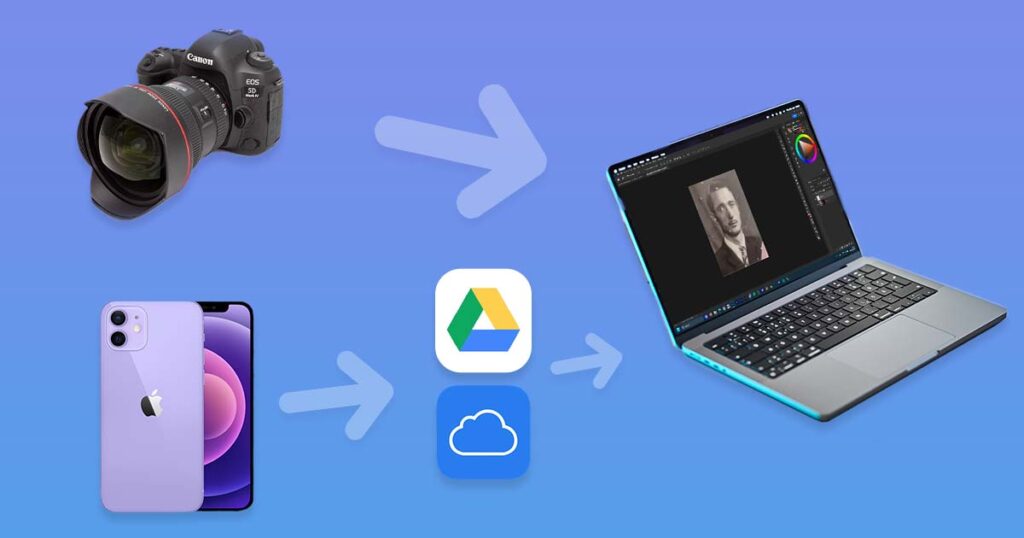
To do this, connect your phone or camera to your computer using a USB cable, and then use a file transfer application to copy the images to your computer.
There are several methods for transferring it:
- Bluetooth technology
- Using the USB cable
- Send it to any Cloud Drive and then download it to your computer.
- Send using NFC
We strongly advise you not to use social media or messages to send files to your PC because these websites compress images, making them smaller in size and quality, which is not what you want in a situation where quality is critical.
2. Import it to Photoshop
Launch Photoshop on your computer and click “File” in the top menu, then select “Open”. Navigate to the location of the photo you want to restore and select it.
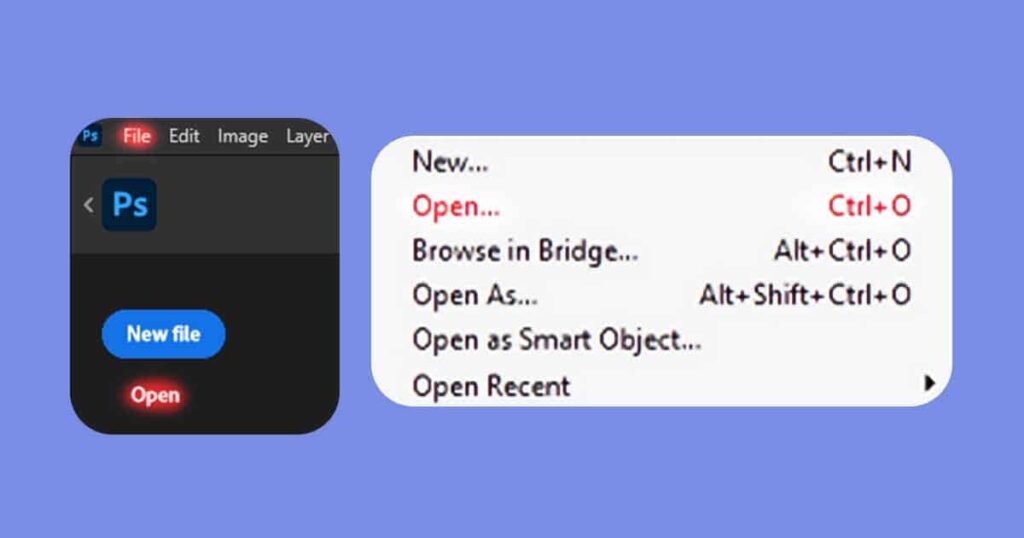
Alternatively, you can just drag and drop your image inside the Photoshop. In both cases the photo will be opened in a new Photoshop document.
3. Crop the Image If Necessary
If there are any unwanted areas around the edges of the photo, such as frames or excess background, you can use the Crop Tool or the Perspective Crop Tool to remove them.
In most cases, if you scanned your photo cropping will be a bit easier to do comparing to working with photo of a photo, but this section will teach you how to work with both!
What is the actual difference between Crop Tool and Perspective Crop Tool?
Don’t worry, these differences are easy to understand, so soon you will use these tools to your advantage! More about these tools, and their shortcuts will be in in section 4.
Crop Tool
To use the Crop Tool, select it from the toolbar or press “C” on your keyboard. Crop tool, obviously, allows you to crop or expand your working area in Photoshop (or any alternative software like Photopea).
- Depending on the tool settings it can remove or leave pixels that are cropped out of frame
- It can be dragged from center, dragged from corners and be scaled proportionally like any other tools
Nothing really special or difficult about this wonderful tool.
Perspective Crop Tool
To use the Perspective Crop Tool, select it from the toolbar or press “Shift + C” on your keyboard. This tool also crops image, but in different way. It is used in order to image, that depicts some flat surface.
It is useful if you photo contains a flat surface images like:
- Printed photograph
- Magazines or newspapers
- Phone or PC screen
- Documents
- Checks
- Billboards
After you select this tool, you will need to click 4 times to set 4 points of perspective.To use this tool successfully you need to understand and follow few simple principles:
- You will be able to move this points before you press Enter. After accepting changes they will affect all the layers your PSD file has.
- These 4 points are corners of your photo. Put them on the corners of image you are trying to crop out.
- After you aligned 4 corner points check if lines between this points are aligned too. Try to make these lines as matching, as possible.
- Make sure you have put them on corners and lines are as precise as possible.
Done! That should cover everything you need to know about both cropping tools! Moving forward to next point.
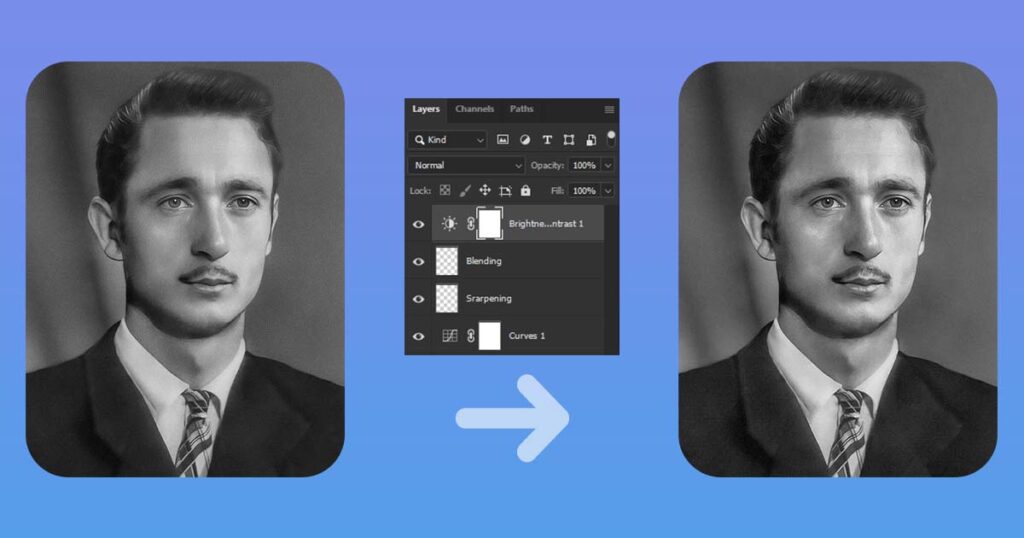
4. Work Non-Destructively
It is not technically a step, but because it is extremely important to learn, it was necessary to create a separate and well-explained section of the article. It will help to explain why you should almost always work this way and how to do this.
To avoid permanently altering the original photo, it’s important to work non-destructively as much as possible. This means using layers, adjustment layers, masks, and smart objects instead of directly editing the pixels of the photo.

The image above depicts screenshots comparing destructive and non-destructive workflow. A larger number of layers is not always better if you use them mindlessly, but it is almost better than just one or two layers because it allows you to go back and fix mistakes or add improvements that you may have missed if you did not use these layers.
- To create a new layer, click the “New Layer” button in the Layers panel or press “Shift + Ctrl + N” on your keyboard and work with this new layer.
- In case if anything will ever go wrong, and you will decide to change something or remove some particular edits, you can just remove the layer with them!
Also, Shortcuts will be a great addition to non-destructive and fast workflow! Shortcuts help you to you save so much time on finding and clicking on the right tools with your mouse.
Turn Your Layers Into Smart Objects
Smart objects in Photoshop are a powerful feature that provides flexibility and non-destructive editing capabilities to your photo restoration workflow.
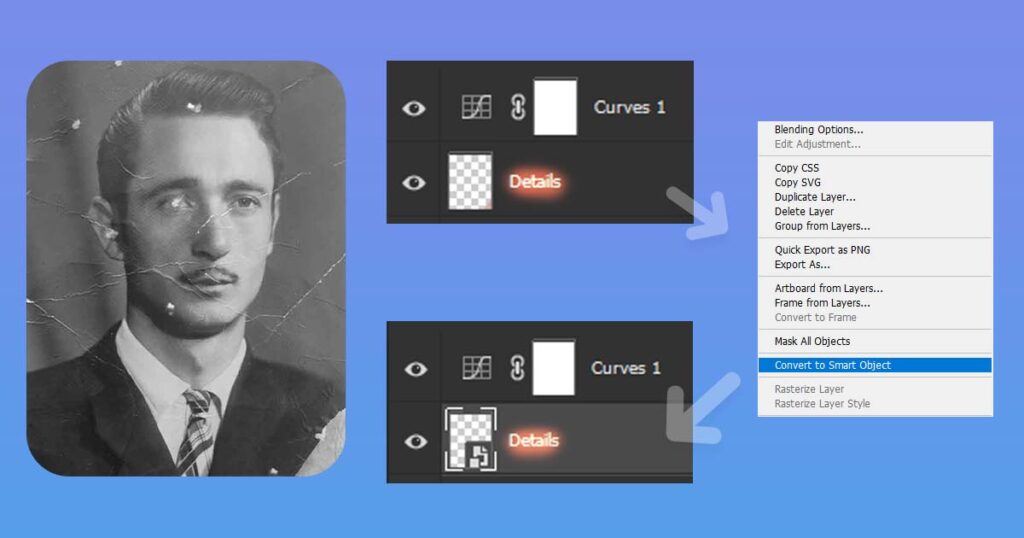
To turn your layer into smart object just right click on the name of the layer and select “Convert to Smart Object”.
Why use a Smart Object
They are essentially layers that contain embedded image data or even other Photoshop documents. Here are several reasons why you would use smart objects in Photoshop:
Smart objects allow you to apply various transformations and adjustments to an image without permanently altering the original data. Any changes made to a smart object can be edited or reversed at any time, preserving the original quality and content.
Smart objects can be scaled up or down without losing any image quality. When you resize a smart object, Photoshop recalculates the pixels based on the original data, resulting in a crisp and clean transformation.
Smart objects can retain the settings and parameters of applied filters and effects, which can be modified or removed later on. This allows you to experiment with different filters without permanently altering the original photo.
Overall, smart objects in Photoshop empower you to work more efficiently, maintain flexibility, and preserve the integrity of your designs. They are particularly useful when working on old photos, since they help you to move back and fix or change anything later.
Why aren’t all layers by default smart objects?
Well, if Smart Objects are this good, why they aren’t default? Good question, let us explain.
Smart objects are not the default option in Photoshop for a few reasons:
- Smart objects can increase the file size of your Photoshop document.
- Smart objects add an additional layer of complexity to the editing process.
- You can’t paint/draw/use pixel cloning tools in Smart Object layer
The last reason is the most serious issue, and it is crucial for photo restoration artists. If you try to paint or use the Clone Stamp tool in a Smart Object layer, the following prompt will appear:
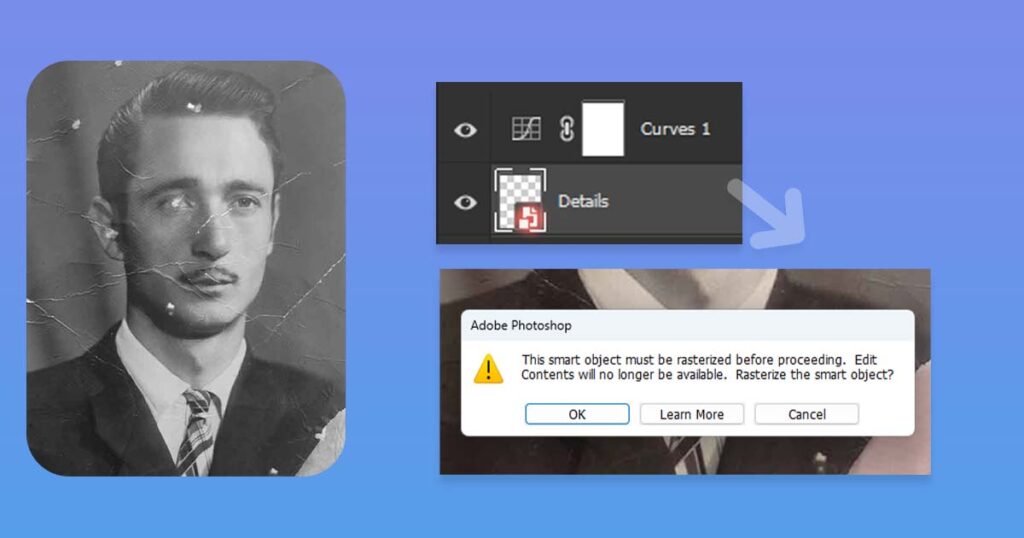
If you would click “OK” and accept it, you will turn this layer back from Smart Object to regular layer. On top of which will be able to draw/use Clone Stamp Tool again.
Or you can click “Cancel” to leave it as Smart Object.
To clarify it even more, you can’t use any tool that acts brush-like:
- Brush Tool
- (Spot) Healing Brush Tool
- Clone Stamp Tool
- Burn/Dodge Tool
- Blur/Smudge Tool
These tools cannot be used on top of the Smart Object layer. What should I do with this? Don’t worry, there is a fantastic solution.
Simply create a new layer above the Smart Objects in your layers panel and draw/copy a pixel on it instead of a smart object!
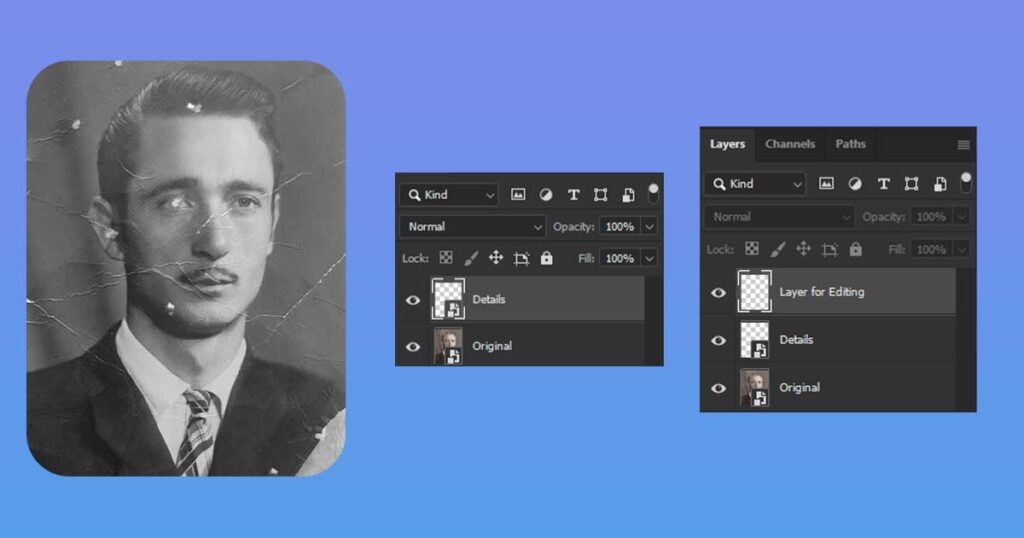
This allows you to go back and change any layer styles, settings, filter, and effect later while still being able to paint on top of it!
Useful Shortcuts
Shortcuts are your best friends! Try to remember at least few shortcuts that you will be using 95% of time. Below you will find the list of main shortcuts you will need to know. They will also partially protect you from getting tired with your image, what will definitely benefit the quality of the final image.
This list covers 90% of photo restoration work:
- Ctrl (CMD) + Z – Undo action(s)
- Ctrl (CMD) + Shift + Z – Redo action(s)
- S – Clone Stamp Tool
- J – Spot Healing Brush Tool
- Ctrl (CMD) + T – Free Transform Tool
- C – Crop Tool
To switch between Tools and their Sub-tools just press Shift + [Tool Shortcut], for example, to change Crop Tool “C” to Perspective Crop Tool you need to click Shift + C.
It will “circle” sub-tools inside of the set, until you will get to the bottom one, and then again.
5. Repair Damage and Imperfections
The next step is to remove any damage from the photo using the Clone Stamp Tool and the Spot Healing Brush tool.

What is the difference Healing Brush and Clone Stamp?
The Healing Brush and Clone Stamp are two important tools in the restoration process, each with their own purpose and technique. Finally, to achieve the best possible result for each unique photo restoration project, you must use both tools in conjunction with other techniques.
Please note: There are other cool, more automated tools like Spot Healing Brush and Remove Tool (available in Photoshop 2023 or newer), but these tools don’t give us much control over how the final result will look, so we’ll use more precise, manual tools for a better outcome.
Quick note:
- Source area: is where you will copy pixels from.
- Target area: is where you will place copied pixels.
Short answers are:
- Clone Stamp: This tool is used to copy pixels from the source area to the target area without blending. Used 80% of the time for working with solid details and precise work.
- Healing Brush: used to copy pixels from the source area and blend them into the target area. Great for blending details after using the Clone Stamp tool or when working with soft materials (skin, fabric, etc.), used 20% of the time.
Here you will learn what these tools are, how they differ, and why and when to use or not use either of them!
The Healing Brush is excellent for blending details
The Healing Brush is primarily employed when dealing with small imperfections, dust, or minor scratches on an image. It works by sampling the surrounding pixels and automatically blending them to seamlessly repair the damaged area.
- The tool analyzes the texture and color of nearby pixels before intelligently filling and blending in the selected area. Because of its nature of attempting to blend pixels, it is an excellent tool for working with soft materials, organic or not.
The Healing Brush is useful for:
- Blending soft object details: fantastic for restoration of a skin, hair, fabric, greenery, and so on.
- Blending pixels with different lighting: taking pixels from the photo’s bright areas and naturally placing and blending them with the photo’s dark areas.
And it is generally bad to work with anything else, such as when you need more precision or when working with any solid things, patterns, and so on.
Clone Stamp is useful for precisely copying and editing pixels and details
On the other hand, the Clone Stamp tool is used for more intricate restoration work. This tool enables the artist to manually select a specific area of the image called the “source” and clone it onto another area, known as the “destination.”
- It allows for precise copying of pixels from one location to another, preserving the texture, lighting, and details of the original source. This tool is particularly handy when dealing with larger damaged areas or complex objects that require careful attention to maintain the authenticity of the image and copying pixels exactly, without any alteration.
The Clone Stamp Tool is useful for:
- Working with solid objects: the most effective method for restoring any solid object
- Alignment precision: The clone stamp tool allows you to precisely copy and align any contours of solid objects.
- Exact copying: this tool simply copies pixels from the source area to the target area without altering them in any way.
The choice between the Healing Brush and Clone Stamp depends on the specific requirements of the image and the extent of the restoration needed.
Work on the New Layer
Just a reminder, work non-destructively. Get used to work in new layer anytime you edit something, it will save your time and nerves. This way, you will always be able to go back and change or remove some restored details you don’t like.
Before you begin repairing damage with the Clone Stamp and Healing Brush, make sure you have created and are working on new layers. This way, if the changes you make look worse than they did before, you will be able to:
- Mask some areas that don’t look right and partially reverse it.
- Rework areas by working with this layer in addition to the original layers beneath it.
- Completely reverse these changes by deleting this layer and starting over with the new layer.
Now, let’s proceed!
Clone Stamp Tool
The Clone Stamp Tool allows you to copy pixels from one part of the photo and paste them over damaged areas. To use the Clone Stamp Tool, select it from the toolbar or press “S” on your keyboard.

In the example above, you can see two images:
- On the left: The current image layer from which we copied pixels is shown. This is the combined layer of all current changes we’ve made.
- On the right: You can see the same image that was copied on top of the gradient layer with the Clone Stamp Tool.
As you can see, we only covered 3/4 of the original gradient layer on the right, so you can see what was below and this, and ensure that the Clone Stamp Tool only copies pixels, with no blending.
Clone Stamp workflow for damage restoration:
Adjust the brush size: click on the brush size drop-down menu or use the “[” and “]” keys to decrease or increase the size, respectively. You can also set the hardness of the brush depending on the edge softness required for the restoration work.
Select the source area: Hold the Alt key (Option key on a Mac) and click on the area of the image you want to clone from. This will define the source point from which you’ll copy the pixels.
Begin cloning: Release the Alt key and click on the area you want to restore or cover with the cloned pixels. The tool will start copying the pixels from the source point and overlay them onto the destination area. You can brush over the damaged or unwanted areas, matching the texture and tone of the surrounding pixels.
Adjust the source point as needed: To clone from a different area, simply hold the Alt key again, click on a new source point, and continue the cloning process. This allows you to select various parts of the image to ensure a seamless restoration.
Blend and refine: After cloning, you may need to blend the cloned pixels more effectively with the surrounding area. You can do this by blending corners of newly copied details using Spot Healing Brush.
Clone Stamp Tool should be used in 8 out of 10 cases when working with old photos, but there is no hard and fast rule about when and where it should be used.
Remember, practice and experimentation are key to mastering the Spot Healing Brush and achieving optimal results in photo restoration. Don’t be afraid to try different techniques and settings to find what works best for each specific image.
Healing Brush Tool
The Spot Healing Brush tool is similar to the Clone Stamp Tool, but it tries to blend the colors and brightness of the source area with the destination area to create a more seamless repair. To use the Spot Healing Brush tool, select it from the toolbar or press “J” on your keyboard.

The comparison image above shows the same image copied from the left side on top of the gradient on the right side. The end result isn’t visually appealing, but it’s only for demonstration purposes, so you can see how these two tools copy pixels differently.
As you can see, the Healing Brush tool is attempting to blend the original image’s color and tones from the Source Area (left) to match the gradient we already have in our Target Area (right).
Spot Healing Brush workflow for blending damaged details:
- Adjust the brush size: you can do this by either clicking on the brush size option in the toolbar or using the bracket keys “[” and “]” as shortcuts to decrease or increase the brush size, respectively.
- You can also change the brush size and roughness by holding down the right mouse button + Alt. Moving the coursing up or down makes the brush rougher or softer, and moving the coursing to the left or right makes the brush bigger or smaller.
- Select the source area: While holding down the Alt key, make a left click on the area of the image where you want to copy pixels. If you’re working with hair, copy pixels from the most similar area of hair, and so on.
- Begin blending: Carefully click and drag the Spot Healing Brush over the damage or imperfections you want to fix, while trying to follow and match lines and direction of these lines.
- Adjust the source point as needed: Repeat this process for each individual spot or flaw until you achieve the desired restoration. For larger areas, it’s often better to use the Clone Stamp tool or a combination of both tools.
- Undo mistakes: Use the shortcut “Ctrl” and “Z” (Windows) or “Cmd” and “Z” (Mac) to undo any mistakes or brush strokes that didn’t turn out as expected.
Remember to save your work regularly to preserve your progress and maintain multiple versions if needed. Additionally, practice and experimentation are key to mastering the Clone Stamp tool for photo restoration.
Also don’ forget to switch between tools regularly! Do it to fix all the areas of the image where blending of the details is needed!
Why use a Spot Healing Brush instead of a Default Spot Healing Brush?
That is an excellent question. Simply put, the Spot Healing Brush tool is an amazing, quick, and simple tool for photo retouching. All you have to do is click on blemishes and other flaws, and they’re gone.
The problem is that you can’t control which pixels you copy, so while it’s great for removing acne, it’s not as good for restoring damaged areas that are 20-40 times larger than the average spots people fix with Healing Brush.
As a result, this brush frequently becomes confused about what this part of the image should look like and may copy some incorrect looking details, such as when you try to restore a large scratch that covers 1/3 of a person’s forehead, and instead of copying skin, it will copy the hair, brows, or even add an additional eye.
To avoid it and have more control over what we do, we’ll use the Healing Brush tool, which allows us to choose which pixels to copy!
You can also do some specific edits or pixel copying on a separate layers, that will help you to have more control over the image and make it look as good and as lose to original as it is even possible.
When you need to put your edits on a new layer:
- When you copying details like eyes, lips or any other details that can be mirrored. You will need as a lot control over their shape, size and everything else to put them into the right spot.
- When you do risky edits, and not sure if they will work out. Removing them as whole layer later will be much easier, then erasing it from other layers.
6. Restore Missing Parts
If there are any missing parts of the photo, you can use a combination of the Clone Stamp Tool and other techniques to recreate them, or you can just use Generative Fill tool that is available in your Photoshop 2026.
Manual restoration of missing parts
To recreate missing parts of the image we will use the same tools we used before. To access the Clone Stamp Tool, select it from the toolbar or press S on your keyboard.

Experiment with different brush sizes and opacities to achieve the best results.
- To avoid distortion – make sure you are working on the new level
- Try to use tool like Free Transform Tool (Ctrl + T) to change shape, size and mirror elements, so they will fit to the image
- When using Free Transform Tool you can also right click on the layer you work on, and then click Warp, this will allow you to precisely deform and warp copied area to match layers underneath it
Generative Fill
If you are working with new Photoshop version that is updated in 2026 you can also use Generative Fill to select restore missing parts of the image.
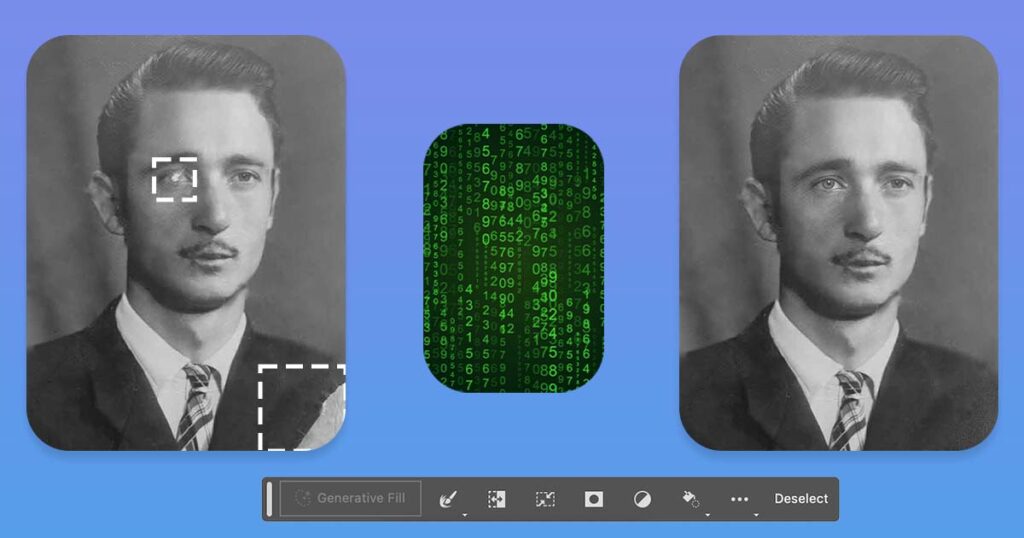
Simply choose the area of the image where you want to generate (or regenerate) details using any selection tool you prefer, such as the Lasso Tool or Rectangular Marquee Tool.
You can either:
- Enter a prompt that describes what you want to see on that section of the image
- Don’t enter a prompt and let Photoshop imagine and create matching details on it’s own
This should work out well whether you used Generative Fill or the manual method with tools like Clone Stamp and other pixel copying tools.
Remove Tool
Remove Tool is the next stage of the Spot Healing Brush Tool, and it employs Stable Diffusion AI models, the same AI that is used in Generative Fill AI, rather than standard and outdated Photoshop algorithms. It’s a fantastic tool for making small, quick changes like:
- Removing small unwanted objects: As the name implies, this tool works wonders when you need to remove something from a photo, such as junk on the floor, a small watermark, or any other object that you believe is detracting from the image.
- Taking care of minor flaws: removing minor cracks, dust, and scratches from the background, clothing, or hair. It will not work well if you want to remove damage from your eyes, nose, lips, or other body parts because it will distort them.
However, as previously stated, this tool is not ideal for working with small details that cannot be distorted. In this case, we still recommend that you use the Clone Stamp and Healing Brush tools.
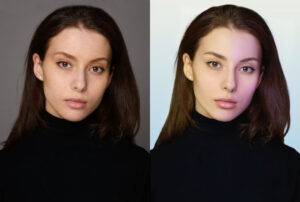
7. Color and Tone Corrections
Only photos with color are appropriate for this step. Don’t skip this step if your photo is in black and white because the changes also apply to black and white images’ values (contrast, blacks, whites, and shades of gray).
You might also want to learn how to manually colorize your black and white photos!
If your photo has colors, but they are not accurate or are faded, you can use:
- Curves adjustment layer (best)
- Levels adjustment layer (not recommended)
- Color Balance adjustment layer
- Camera Raw Filter (advanced)
Either of these tools, and especially combination of them to adjust the overall color of the photo.
After restoring a black-and-white, faded, or color-shifted photo, you can use adjustment layers and filters to achieve the desired results.
Here’s a quick rundown of how to use each of the adjustment layers for color and tonal adjustments:
Curves: Curves provide more control over brightness and contrast than Levels. To add more contrast, create an S-shaped curve, or adjust the individual color channels to correct color imbalances. Experiment with the curve by dragging points until you get the look you want.
Camera Raw Filter: The Camera Raw Filter is a powerful color correction tool. To use it, navigate to the Filter menu and select Camera Raw Filter. You can change your photo’s exposure, contrast, highlights, shadows, whites, blacks, clarity, vibrance, and saturation here. In the following chapter, we will go over how to use the filter in greater detail.
Hue/Saturation: You can use this adjustment layer to change the colors in your photo. To make the colors more vibrant or subdued, you can adjust the saturation. To correct any color shifts in the image, use the sliders to adjust the hue. For example, if the image appears too yellow, you can balance it by shifting the hue to blue.
Color Balance: Color Balance corrects color casts in your photos. By dragging sliders, you can individually adjust the shadows, midtones, and highlights. For example, if your image appears too blue, add some yellow to balance it out.
Awesome! Now let’s learn how and why to use Curves Adjustment layer for color and tone corrections!
What are Curves and how to use them
Let us begin with the Curves. Let us first explain some basic mechanics of the Curves layer in a very simplified manner.
Consider the Curves adjustment in Photoshop to be a tool for adjusting the brightness and contrast of different tonal ranges in your image.
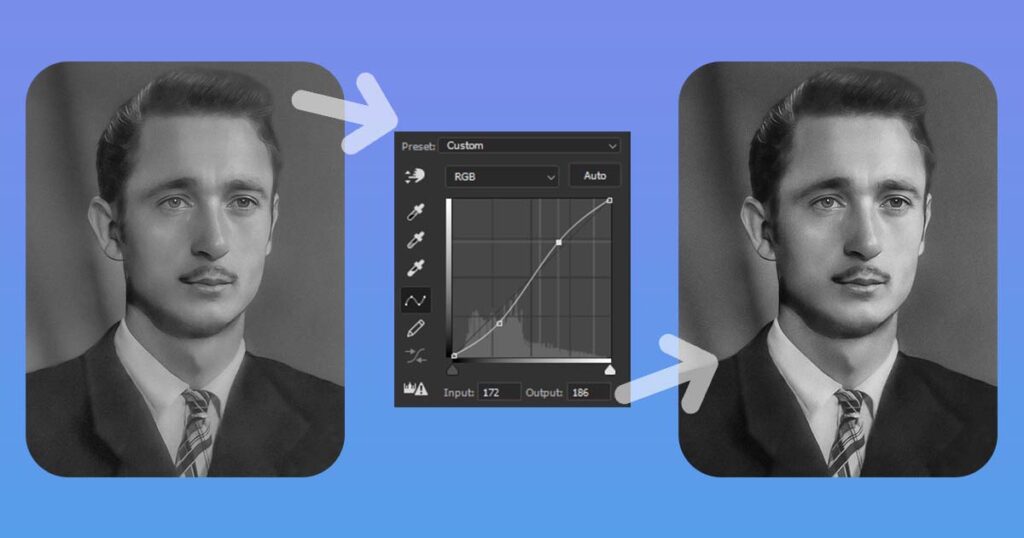
Consider a graph with a diagonal line connecting the bottom left and top right corners. This line represents your image’s original tonal values. The darkest areas (shadows) are on the bottom left, and the brightest areas (highlights) are on the top right.
- You can change the tonal values by clicking and dragging on this diagonal line. Pulling the line upward brightens the image’s corresponding areas, while pulling it downward darkens them.
- You can also add points to the line and adjust them separately. Adding a point to the bottom left and dragging it upwards, for example, would brighten the shadows, while adding a point to the top right and dragging it downwards would darken the highlights.
- The overall contrast and tonal distribution in your image are determined by the shape you create by manipulating the line or adding points. Pulling the line into an S-curve shape, for example, can increase contrast by making the shadows darker and the highlights brighter.
- In addition to the RGB channel, you can adjust the individual color channels (red, green, and blue) separately using the Curves dialog box’s dropdown menu. This gives you the ability to fine-tune the color balance and correct any color imbalances.
Remember to experiment with the Curves adjustment. It may take some practice to get used to, but once you do, you’ll have a powerful tool at your disposal for adjusting the brightness, contrast, and color balance of your images.
How to use Curves
Now that we’ve defined Curves, let’s put them to work. Here are the simple steps:
- Create a Curves adjustment layer in Photoshop.
- Locate the newly created layer in the layers tab and left-click on the graph icon to see Curves options.
- If the Curves adjustment options menu does not appear: To open this window, go to the top menu’s Window tab and select Properties (if it is already active and has a checkmark next to it, simply locate the actual window).
- Select Auto while holding down Alt. Click the Snap Neutral Midtones button, then choose one of four Algorithm options.
Done! This is an automatic method for improving your image’s color and contrast values!
8. Restore, Sharpen and Redefine Details
To adjust the overall tones of the photo, you can use the Curves adjustment layer. To create a Curves adjustment layer, click the “New Adjustment Layer” button in the Layers panel and select “Curves” from the menu.

Use the sliders in the Curves panel to adjust the tones of the photo. You can also use the Camera Raw Filter to adjust the tones and other image settings.
9. Make Any Final Edits
At this point, you should have repaired most of the damage and restored any missing parts of the photo. However, you may still need to make some final edits to remove any remaining imperfections or to fine-tune the overall appearance of the photo.
Use the Clone Stamp Tool, the Healing Brush tool, and other tools and techniques to make any final edits as needed.
Camera Raw Filter
After you’ve identified and corrected any minor flaws, it’s time to apply the best filter for post-processing any photograph – the Camera Raw Filter. If you’re not familiar with it, CRF is a tool that migrated from Lightroom to Photoshop, so it has a lot of powerful tools built in that help you achieve amazing improvements in the appearance of the image with the use of a few sliders!
What to know Camera Raw Filter
It’s difficult to explain what this filter is and how to use it, so we’ll just give you a few pointers on what parts to use and what results to look for.
- It’s not science: the only thing that matters is whether or not you like the outcome.
- Customization: this filter is ideal for use with Smart Object layers.
- No extremes: neither of these sliders should be used to be value of negative or positive 100
These few theoretical principles are important to remember when working with Camera Raw Filter!
How to use Camera Raw Filter
Before we can use the Camera Raw Filter, we must first perform a few quick steps:
- Select Top Layer: In the layer panel, left-click and select the top visible layer.
- Create a Merged Layer: press Ctrl (CMD) + Alt + Shift + E to create a merged layer that is a copy of what you see on your screen. It makes a merged copy of your layers without affecting any layers below it.
- Smart Object: Make this layer a smart object layer so that we can change the filter’s values at any time.
- Open Camera Raw Filter: To open a Camera Raw, select the newly created Smart Object layer and press Ctrl (CMD) + Shift + A. You can also go to Filter – Camera Raw Filter.
Now let’s get closer to practical advices of what exactly and how exactly to use it, what sliders to change and what it will affect. On the right side of the interface you can see panels like “Basic”, “Curve”, “Detail” etc.
Quick tip: If you’re not sure which slider to use or whether to move it in a negative or positive direction, simply move it to both +100 and -100, see which one looks better, and then move the slider slightly in that direction (if you liked +100 better, you only need to have your slider in the +5 to +30 range, never leave it at +100).
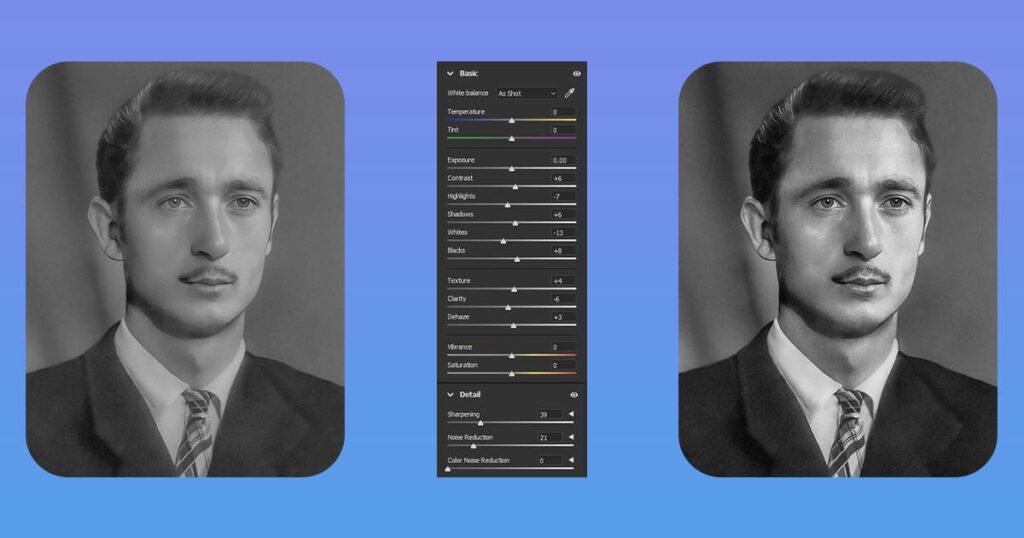
Please keep in mind: Here are our suggestions for which sliders to use in each of these panels. that we will only tell you what moving the slider to the right (positive values) will do, because moving the slider to the left (negative values) will simply be the inverse.
You also can click on the eye cion on the right side of each panel to temporarily turn in off and compare how your edits will affect restored photo!
Basic
Sliders within this panel are used to change some basic image values, which can make a significant difference in the final image’s appearance. Here are a few of the most important things you should be aware of!
- Exposure: the process of making the entire image darker or brighter. Moving it to the right brightens all pixels in the image. Keep the Exposure value at 0.2 or less in either direction.
- Contrast: used to increase or decrease the image’s contrast. Moving it to the right causes dark pixels to become brighter and bright pixels to become darker. Keep Contrast value to be 30 or less in either direction.
- Highlights: used to make the brightest pixels (the top 90% brightest) brighter or darker. Moving it to the right increases the brightness of the brightest pixels. Keep Highlights value at 30 or less in either direction.
- Shadows: used to make the darkest pixels (the top 90% dark) brighter or darker. Moving it to the right causes the darkest pixels to become even darker. Keep Shadows value at 30 or less in either direction.
- Texture: used to make the image’s texture more or less pronounced. Moving it to the right will sharpen and texture the image. Keep Texture value at 30 or less in either direction.
- Dehaze: used to add or subtract a foggy or hazy effect to an image. Moving it to the right will make the image clearer and less hazy. Keep Dehaze value at 30 or less in either direction.
You should exercise caution when using either of these sliders. If you already like the way our image looks, don’t use it. Overprocessing images may make them look worse than underdressing, so be cautious! That should do it!
Detail
These sliders are used to make an image appear sharper and more textured, or softer. There are only a few sliders, but we will use only two of them:
- Noise Reduction: used to remove noise and soften the image. Moving it to the right softens, airbrushes, and softens the image. Keep Noise Reduction value at 30 or less in either direction.
- Sharpening: used to enhance the texture of an image. Moving it to the right will shape the image more, making it more defined and grainy. Keep Sharpening value at 30 or less in either direction.
This panel is simple to use; you can use it to make your photo sharper or softer, depending on what you already have and what you prefer. That’s all!
Effect
The last panel that we can use, just at a cherry on top of a pie.
- Grain (aka Noise): used to add grain or noise to the image. Moving it to the right add grain to the image. Keep Grain value at 30 or less in either direction.
- Vignetting: used to enhance either darken or brighten corners of the image, help to improve focus on the image. Moving it to the left darken the corners of the photo. Keep Vignetting value at 30 or less in either direction.
Awesome, with this you are almost done!
10. Save The Restored Photo
When you are satisfied with the restored photo, click “File” in the top menu and select “Save As”.
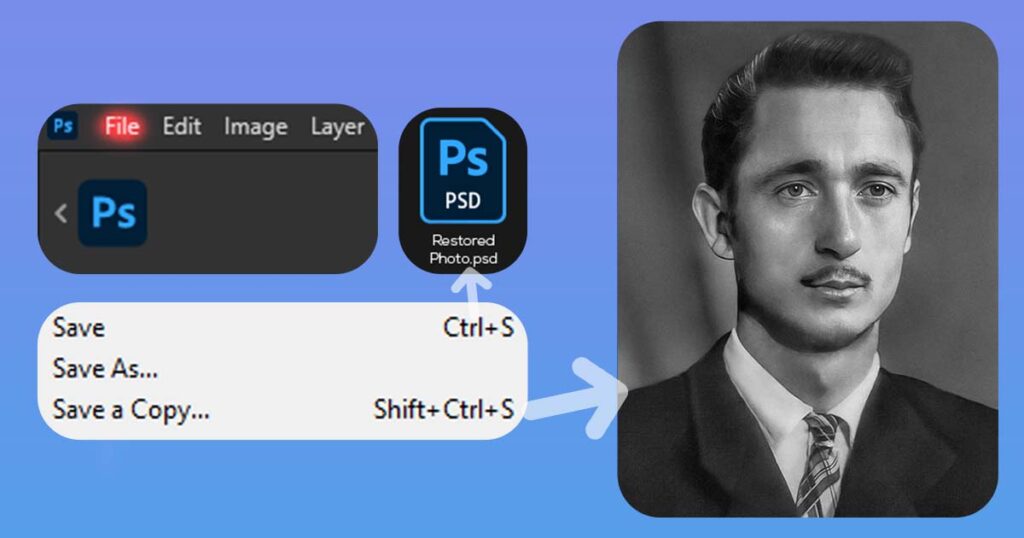
Navigate to the location where you want to save the restored photo and enter a name for the file, select the format like Jpeg or PNG and lick “Save” to save the restored photo.
Save as PSD
It is also strongly advised to save files as PSD (Photoshop Document). It will save the source file you were working on, along with all the layers and edits you made, so you can go back and edit anything you need later!
If you do not intend to continue with enhancements or believe that the photo is perfect as is, you can stop here. Congratulations! For everyone else who wants the best possible outcome, let’s take a short break to rest our eyes before continuing.
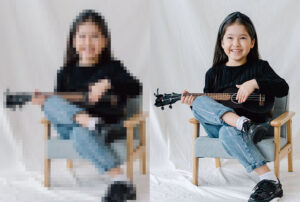
11. Photo Enhancement (optional)
It is now time to learn how, when, and why to use (or not use) AI to improve the final image quality. This step is completely optional, and you can either follow it or skip it depending on whether you prefer authenticity or beauty.
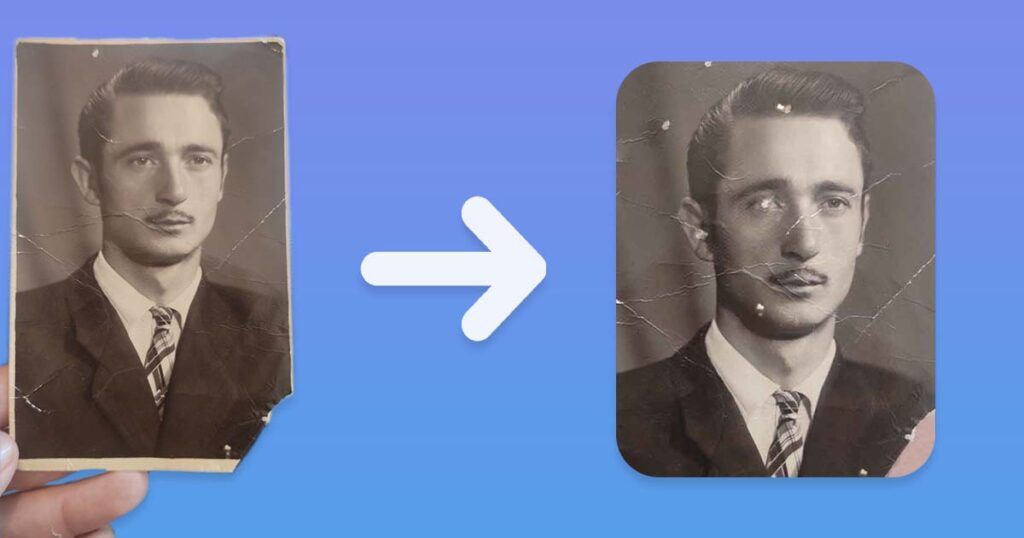
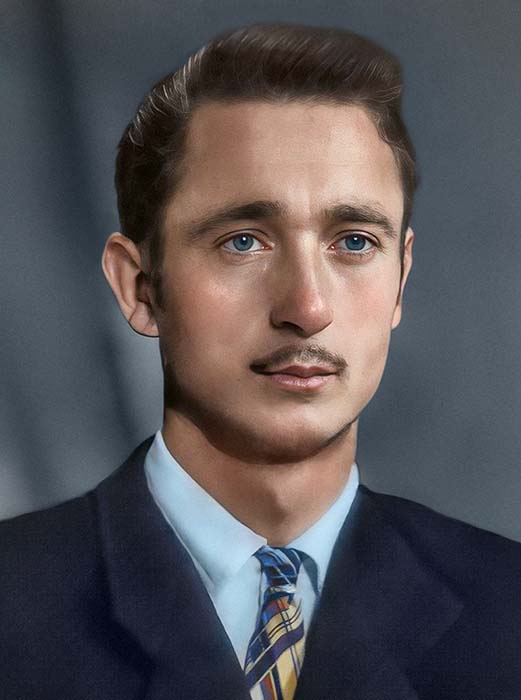
Because the image used in the tutorial and all of the examples above were meticulously enhanced with AI in previous step previews, let’s compare how it looked before and after AI.

Even if you prefer the authenticity of the image, there are ways to use AI without destroying the authenticity of your photo.
What to know about AI in Photo Restoration
You may have seen some AI photo restorations before, and they almost always look terrible. When people think of AI photo restoration, the first few things that come to mind are distorted faces, visible unnatural texture of skin and especially hair.
And there are reasons for it, because most people who simply use AI on a photo and call it “restored” are the reason why such an opinion of AI is correct.
AI is a supplementary tool, not a replacement for artists
Okay, now that we know about what reputation AI has in the field of photo restoration, let’s find out why it is
AI, like everything else, can be used in a variety of ways:
- Simply use AI results: this is the most common way for amateur artists to use AI, and it is the main reason why most people despise it. It is never a good idea to simply upload your photo to AI, click a single button, download it, and then call your photo “restored. This often leads to extremely off-putting and distorted results.
- Blend and polish AI results: this is what transforms AI from the main character to a useful assisting tool, helping to polish results and achieve what can be done manually while not distorting original details and preserving the vintage look and beauty of the photo.
Given the information presented above, we should always use AI as a supplementary tool, and always perform quality control and manual corrections of photos before considering AI, and always manually correct and blend the output of AI after using it.
If something looks too good – it’s fake
AI is not magic wand, and it can’t restored something that is not visible to human eye. According to our experience, 95% of the job, and thus the result, is still precise manual work, while AI is only 5% of the job to polish and refine what we previously done manually. AI should not be used to replace humans in damage restoration because it will cause significant distortion.
It is critical to understand:
- If your photo can be restored without the use of AI and still look good and accurate – this photo is recoverable and could benefit from some sharpening, but it doesn’t.
- If your photo cannot be restored without the use of AI or looks horribly distorted after it, it is not restorable; any results obtained after restoration will be speculative, with little to no similarities to the original image.
The human brain is an amazing tool designed to see details, particularly those related to living creatures, such as faces, even when these details are absent (as in visual illusions, abstract ats, and so on).
It’s simple: if you can’t see details in the original image, AI won’t be able to see them either. If you get any result from a photo that had nothing to work with in the first place, you will get an image of someone or something else that is unrelated to the image’s original content.
How to use AI
Now that we know what AI is and why and when you should or should use it, let’s learn how to use it!
1. Pick AI you want to use
When it comes to photo enhancement AI, there are many options to choose from. From our experience, the best and free one we can recommend to newcomers in the field is Replicate GPF-GAN.
This one produces the best results and is simple to use. All you have to do is sign in with your GitHub account or create one if you don’t already have one.
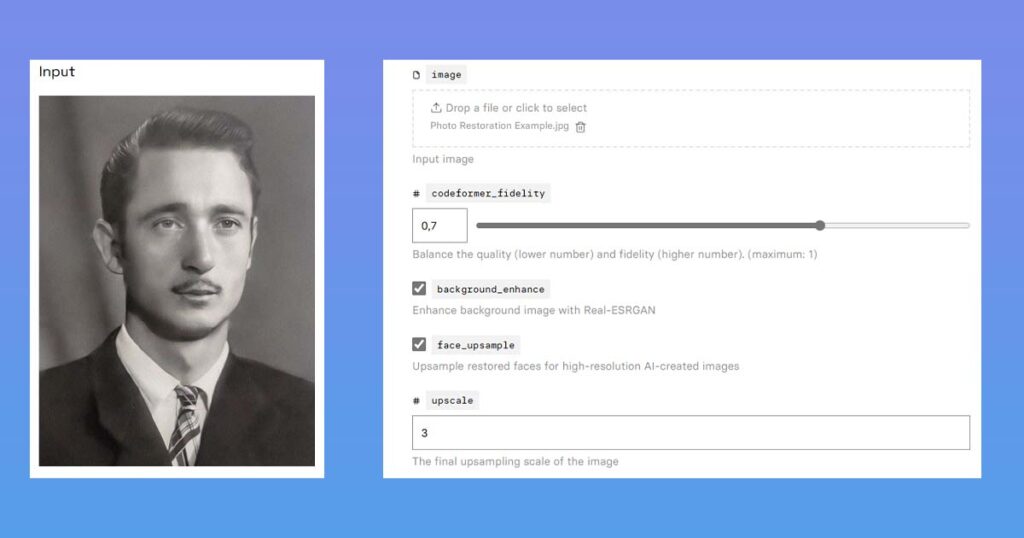
2. Upload image and play with settings
You will see this page after opening the link with the Replicate AI model that we shared and logging in with the GitHub account you previously had or registered with. The image on this page is subject to change and serves only as an example of what this AI is capable of.
You will need to use:
- Image: You can upload your own image in this section. Click or drag and drop your file into the upload field.
- Codeformer Fidelity: This is a field that determines how close the final photo will be to the original, with 1 being the most close but with few to no changes and 0.1 being far from the original but with many enhancements. We recommend that you use a few values in the 0.6 – 0.9 range and save a few copies for later comparison.
- Scale: the number of times the final image should be larger than the current file, where 1 is the same size and 2+ is two times (or more).
Create a few versions to choose from, download each one, and choose the best one.
3. Put it back to Photoshop
Now when you your photo enhanced you can just drag and drop file(s) inside the Photoshop. After you will put them inside the Photoshop, make sure you will zoom and to the image and select layer(s) with AI enhanced images, press Ctrl (CMD) + T to use Free Transform tool, and will drag any 2 diagonal corners (like bottom left and top right) to fit exact borders of the canvas.
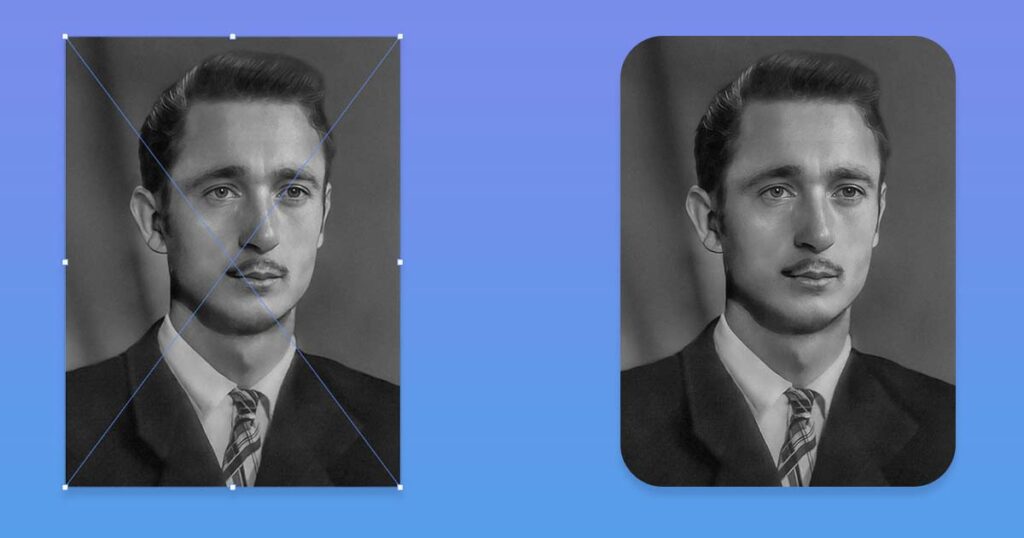
You need to stretch these corners in order to make sure you have “exact match” and top photo will not be moved even in few pixels, because that will make huge problem in the blending stage.
To make sure you put your layers exactly like they were originally turn them on and off few times, and if they are not moving you are done!
4. Blend it
The final step is to blend this layer with the layers beneath it so that your final image has a natural look with sharp and beautiful details!
We recommend that you make the following changes in the following order:
- Transparency: set the visibility of the AI enhanced layer to 50-80%.
- Masking: using a mask and a soft brush with a flow value of 2-6%, mask out any areas that appear strange.
- Cloning: use the Clone Stamp tool and the Spot Healing Brush tool to correct any other flaws in the image.
That’s all there is to photo enhancement
12. Correct Mistakes
This is the last step, and we’re done! Take a 5-15-minute well-deserved break. As previously stated, it will allow you to rest your eyes and brain while also allowing you to notice and correct any mistakes you may have made that you were previously unable to see.
Here are some common mistakes you may encounter and how to correct them using various tools:
- Dust, cracks, or scratches: make a new Layer and use the Spot Healing Brush and Clone Stamp.
- Stains, shadows or highlights: Create a Curves layer with either darkening or brightening set up, then inverse mask it by clicking on it and pressing Ctrl (CMD) + I, then drawing it back softly with a Brush tool until it is gone.
- Parts that are missing: To fill in the gaps in the image, use tools like Clone Stamp or Generative Fill.
- Details that have been distorted: Disable layers one by one in a layer panel until you return to the point where you made a mistake and distorted the detail.
- Make a Merged Copy of Visible Layers by pressing Ctrl + Alt + Shift + E (or Cmd + Option + Shift + E on a Mac) and dragging it to the top.
- Make all of the layers beneath it visible once more.
- By holding down the Alt key and clicking on a Mask icon, you can add an Inverted Mask (Black Mask). Use it to make only the necessary areas visible with the help of a Brush tool.
- Blend it with the layers beneath it with whatever tools you prefer.
- The image has too much or too little texture: Make a Merged Copy of Visible Layers, Smart Object the layer, and use Camera Raw Filter (Ctrl + Shift + A), then go to the Detail tab and use sliders to add or remove texture.
These are the most common mistakes you may notice at the end of your photo editing process. Spot and fix a few of these and your final image will look much better in minutes!
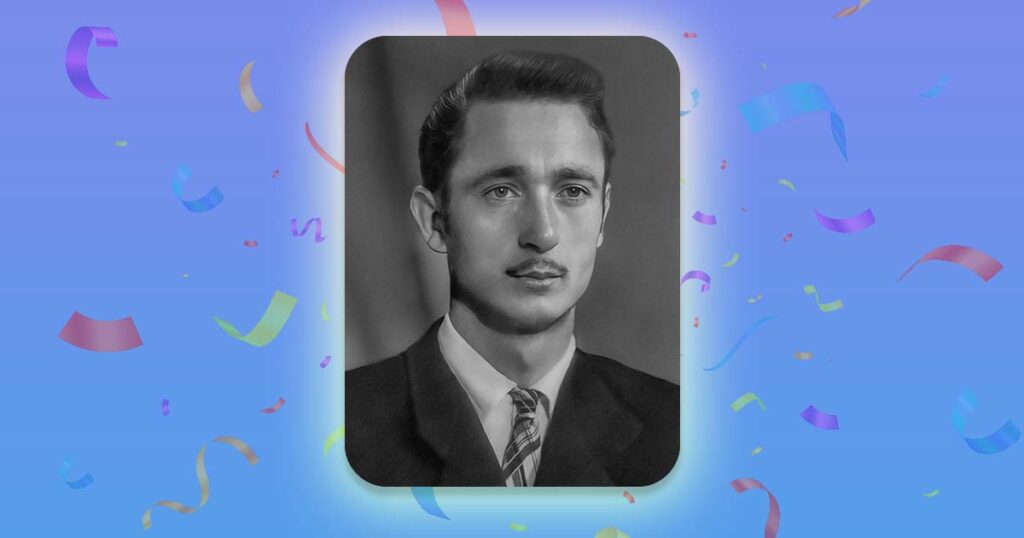
13. Done
Congratulations, you have now successfully restored your old photo using Photoshop! With practice and patience, you should be able to achieve excellent results.
If you are having difficulty restoring your photos or if the damage is too severe, you may want to consider hiring a professional photo restoration service to get the best possible results.
We hope this tutorial has been helpful and that you are able to restore your old photos successfully. Remember to work non-destructively and to use a variety of tools and techniques to remove damage and restore missing parts. Good luck with your restoration project!
How to Colorize Your Old Photos in 2026?
Do you want to colorize a black-and-white photograph? Or is it possible that the colors in your photos were originally so distorted that they cannot be restored with color correction?
In either of these cases, you simply need to convert your photo to a true black and white image using the Black & White adjustment layer before beginning to colorize it.
If you are ready, you can read our article on how to colorize black and white photos!
What If You Can’t Restore Your Photos on Your Own?
If you are unable to restore your photos on your own, there are several reasons why this might be the case. The photo may be too damaged, making it difficult or impossible to repair using digital techniques.
Alternatively, you may not have the time or patience to learn the skills required for photo restoration, or you may not want to spend money on software or subscriptions. In these cases, it may be best to trust the restoration process to a professional photo restoration service.
Professional Photo Restoration Service
If you are unable to restore your photos on your own, we recommend using a professional photo restoration service to get the best possible results.
Our team of skilled technicians have the knowledge and experience to restore even the most severely damaged photos. We use advanced techniques and tools to repair damage and recreate missing parts, resulting in beautiful, restored photos that are as close to the original as possible.
Get a Free Quote
✔ Professional Photo Restoration
✔ Fast Delivery (1-4 Business days)
✔ Low Price Without Taxes or Fees
✔ Unlimited Free Revisions
✔ Satisfaction Guarantee
LEARN MORESubscribe to Newsletter
What is Photo Colorization and How Does It Work?
You have heard about it multiple times, but still don't [...]
Jan
Can AI Really Restore Old Photos? 2026
Can AI really restore your photos at home, without any [...]
Dec
Old Photo Restoration Tutorial 2026 – Easy Photoshop Guide
Did you find some old and damaged photos at home? [...]
Dec
Photo Editing vs Restoration: What’s The Difference?
You have heard about both photo editing and photo restoration [...]
Dec
The History of Photo Restoration 2026
Discover the rich history of photo restoration, a practice dating [...]
Dec
Blurry and Out-of-Focus Images: A Guide to Photo Restoration
Have you ever taken a photo that you were really [...]
Jan
How to Protect Your Old Photos From Damage
Do you have some old printed photos that are dear [...]
Jan
AI vs. Photo Restoration Services Compared: Which is Best for My Old Photos?
Compare photo restoration AI and professional services side-by-side. Uncover the [...]
Jun
What is Photo Restoration and How Does it Work? 2025
Want to know what photo restoration is and how does [...]
Dec
Does Walgreens Still Provide Photo Restoration Services?
Walgreens is a well-known pharmacy chain that offers old photo restoration services. [...]
Apr
5 Benefits of Old Photo Restoration: Protect Your History
Do you want to explore the history of your family? [...]
Jan
20 Stunning Photo Restoration Examples: Before & After Gallery
Discover 20 Stunning Examples of Photo Restoration, showcasing amazing transformations [...]
Sep