
Best AI Photo Colorization in 2026 Completely for Free
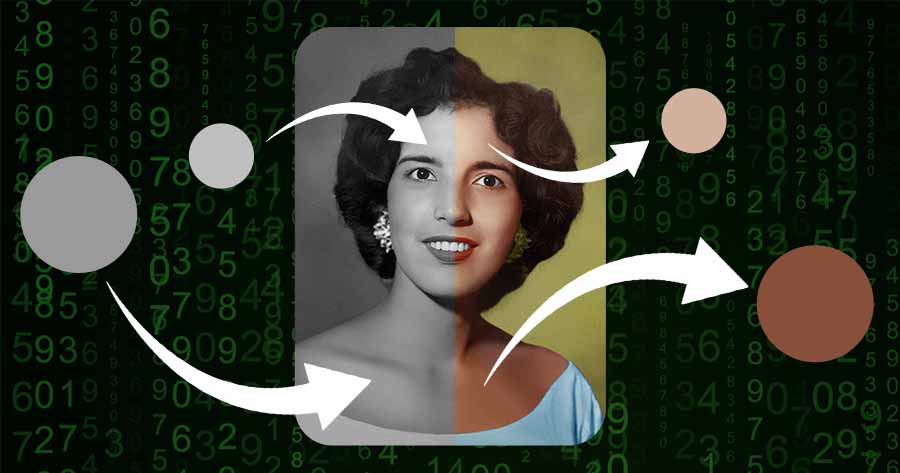
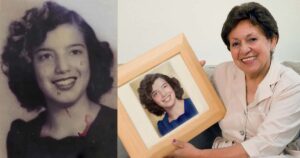
Are your old black-and-white photos collecting dust? Hello, and welcome to the future of photo colorization! In 2026, use the incredible power of AI to breathe new life into your favorite memories.
In just a few minutes, you’ll discover how to automatically colorize your photos with AI! If you want to learn even more, we’ll reveal how to later improve these AI colorizations using Photoshop or a free alternative. Let’s get started and bring back the vibrant colors of the past!

In this article you will learn:
- What photo colorization tools are available in 2026
- How to get your photos colorized by AI fully automatically
- How to improve AI colorized photo to perfection using Photoshop or it’s free alternatives
Also, worth mentioning that you don’t need to know anything about photo coloration, restoration, editing or Photoshop in order to get your photos done!
- If you want to learn how to manually colorize your old photos or how to use Photoshop to restore old photos, read these articles instead.
Let’s get started right away!
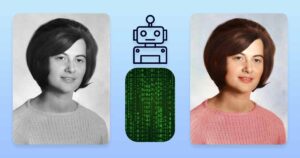
Fully Automatic Photo Colorization With AI
In this section of the article, we will try to explain how to colorize your photos using with just AI tools. You don’t need to know anything about photo restoration or colorization in order to get them done!
Pick Your Photo Colorization AI
When it comes to photo colorization AI, there are several options available that utilize advanced algorithms to automatically add color to black and white or faded photographs.
All of these AI colorization tools are available online and free, with paid options available if necessary. Here, we will share a few best ones that we used and can recommend.
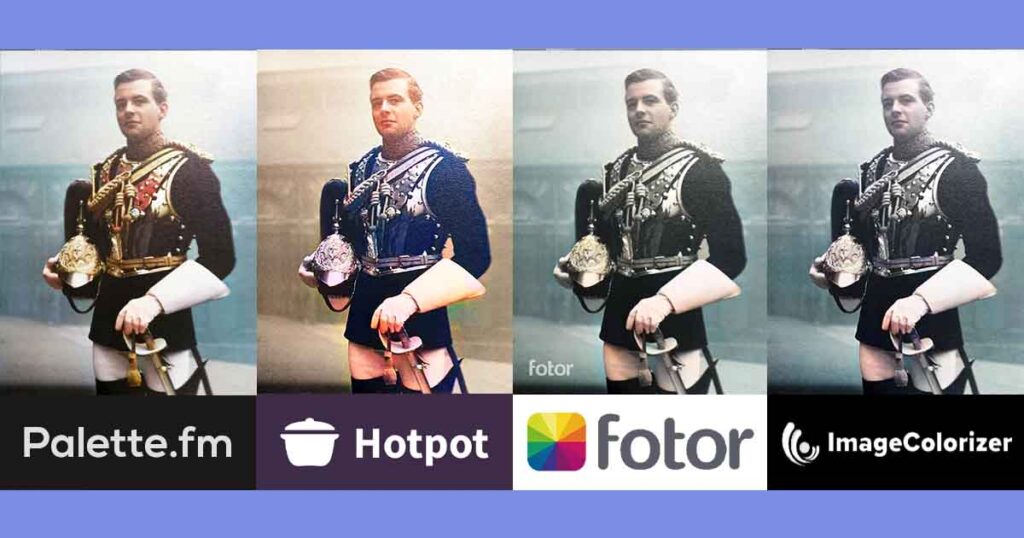
1. Palette.fm
There are numerous useful AI tools available online, but Palette.fm is the best photo colorization AI for a variety of reasons, including:
- Beautiful colors and the most natural-looking colorization
- Allowing you to select from over 30 different color variations
- Processing is simple to use.
We will use and recommend this AI later in this tutorial, but if you are unable or unwilling to use it, feel free to use other tools from the list!
2. Hotpot.ai
Hotpot.ai is another excellent option for quickly coloring old photos. Although less customizable, it still produces excellent results!
3. ImageColorizer.com
ImageColorizer.com is a fantastic tool that produces excellent photo coloring results!
4. Vance.ai
VanceAI.com is a great option for automatic photo colorization. While it is not our favorite tools, it works very well with some photos.
5. Fotor.com
Fotor.com is the one of the best option when it comes to free photo editing online. Among lots of other options Fotor also have AI filters for photo restoration and colorization.
While there are many good photo colorization tools available online, we will stick with the one we use and enjoy the most.
How to get old photos colorized by AI fully automatically?
Well, getting your old photos colorized by AI is truly easy! We will lead you trough few very easy steps now!
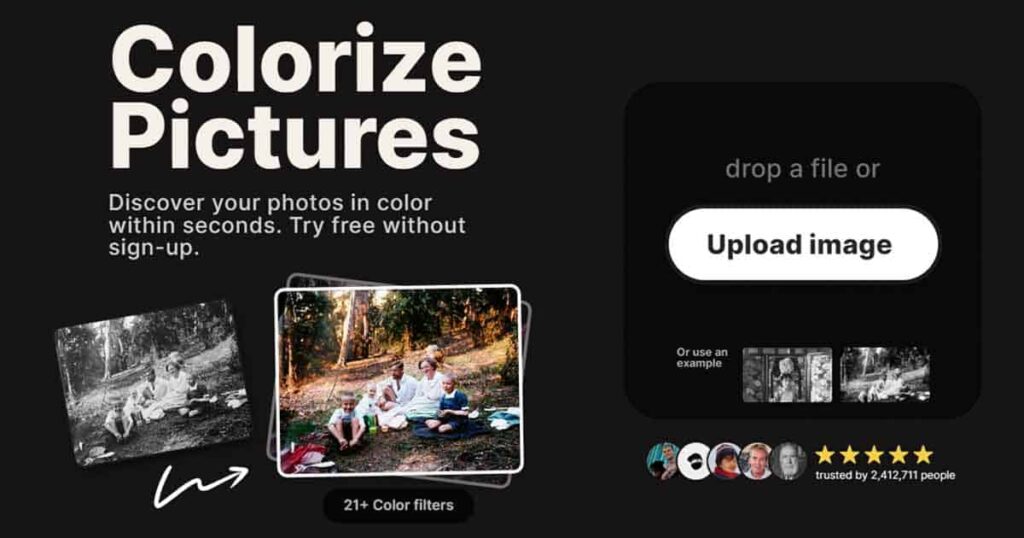
1. Upload Your Image to AI Photo Colorizer
We’ll be using Palette.fm in the following sections of the article because it consistently produces the best-looking results, has amazing customization options, and an easy-to-use design!
If for some reason you decide to use an alternative tool, the steps will be similar to what Palette.fm provides, so don’t worry if you prefer another tool.
How to upload your photo
Go to Palette.fm and click the Upload Image button to begin the colorization process. You can also simply drag and drop your image into the field.
Then, just wait until it will upload and process the Original. Then click on tabs above like Base Palette or any other fancy palettes names like “Royal Vibes” to let AI colorized your photo in a different photo colorization styles.
2. Pick Your Favorite Colorization
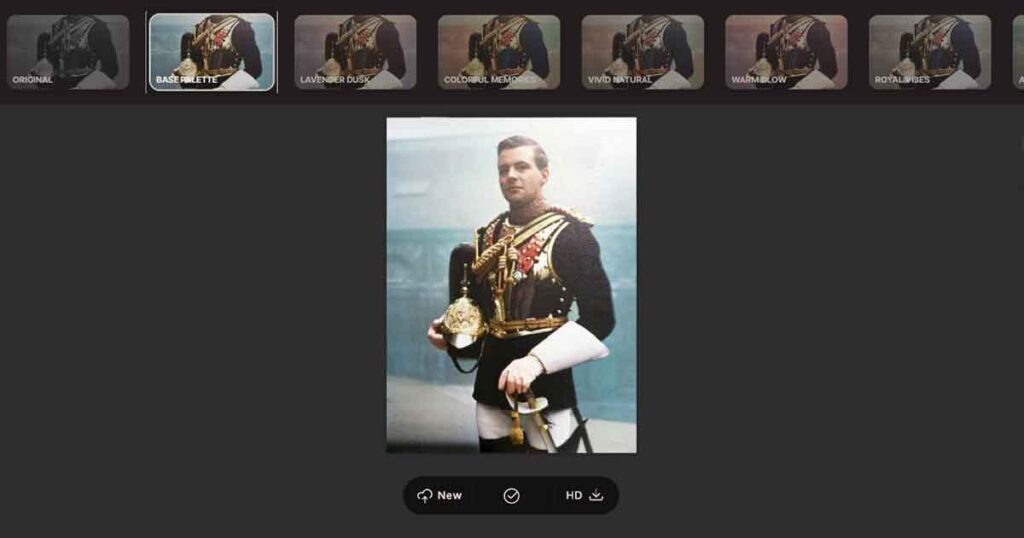
After they will be processed by AI, you will be able to click and colorize these options and pick the one you love the most.
Download the nest one
After this you can download the file. You will have 2 options:
- Download for free: Colorized photos can be downloaded for free, but at a lower resolution. Not really usable unless you intend to manually modify them.
- Download HD: Purchase and download high-resolution photos that can be printed or shared online immediately after purchase.
The Photo Is Perfect After AI colorization, and You Don’t Want to Edit Anything?
If after using AI colorization your photo looks perfect and you don’t want to bother and change anything, and just want to download and enjoy the image as it is now – you can just buy and download the image in HD.
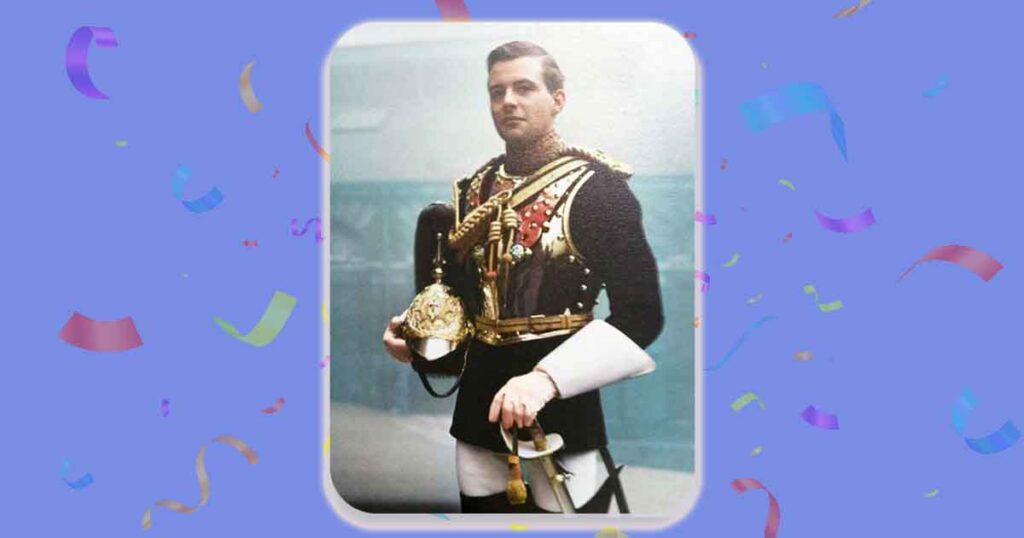
Buying the photo in HD resolution is optional in our case because we will be processing it anyway, but if you want to download and use this image as is, without any editing, or simply support the author, consider purchasing it.
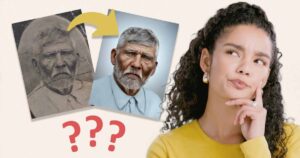
Improve AI Colorization with Photoshop
As with everything AI, at least for the time being, 2026 technologies are far from perfect, and while we have many AI photo restoration and photo colorization tools, the results they provide are rarely perfect as they are, because AI still makes odd choices of what and how to colorize.
- We also have a comprehensive tutorial on manual photo colonization with Photoshop that will teach you everything you need to know in greater details.
Among the most common AI colorization issues are:
- Incorrectly chosen colors for eyes, hair, clothing, and so on
- Some details, such as hands, eyes, feet, and boots, are missing.
- Borders that are a mess, and colorization elements that were added by accident nearby
- Color splotches and stains of various colors
- Colorization of clothing, skin, background, and so on is inconsistent.
And much, much more. AI is incredible, but it is far from perfect. So, what should we do in this case if we already have a reasonably good-looking image but are still not satisfied with result? Let’s fix it!
Using Photoshop or Photopea to Correct AI Photo Colorization
It’s finally time to break out the Photoshop! Don’t worry if you’re a total newbie and are intimidated by Photoshop – don’t worry. We’ll make the instructions as simple to follow as possible!
If you don’t want to buy Photoshop or can’t use it right now, you can use Photopea.com, which is a completely free Photoshop alternative with all of the features we require!
1. Open The Original Photo With Photoshop
First thing you need to do is to open original photo inside of the Photoshop. For this you can either go to File – Open or just drag and drop your photo into Photoshop so it will open automatically.
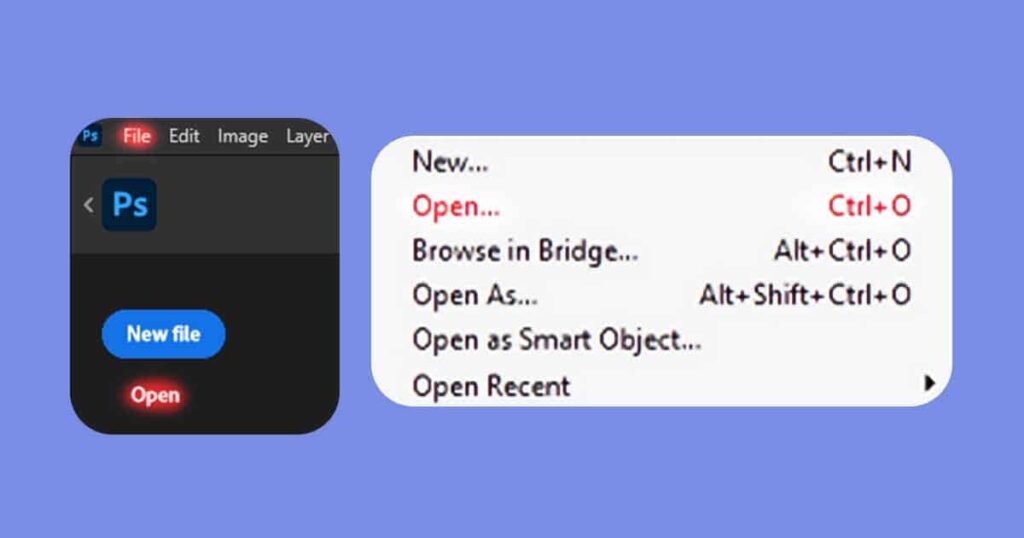
Note: If you purchased the full-size HD colorized photo, you can open it directly and skip the next two steps of this tutorial.
2.5 Fix Minor Issues of the Photo
This is an optional step that is only required if your photo was photographed rather than scanned. After you open a photo in Photoshop, it is recommended that you make some minor changes to the photo to eliminate any issues that may have arisen if you had taken a photo of your old photo instead of scanning it.
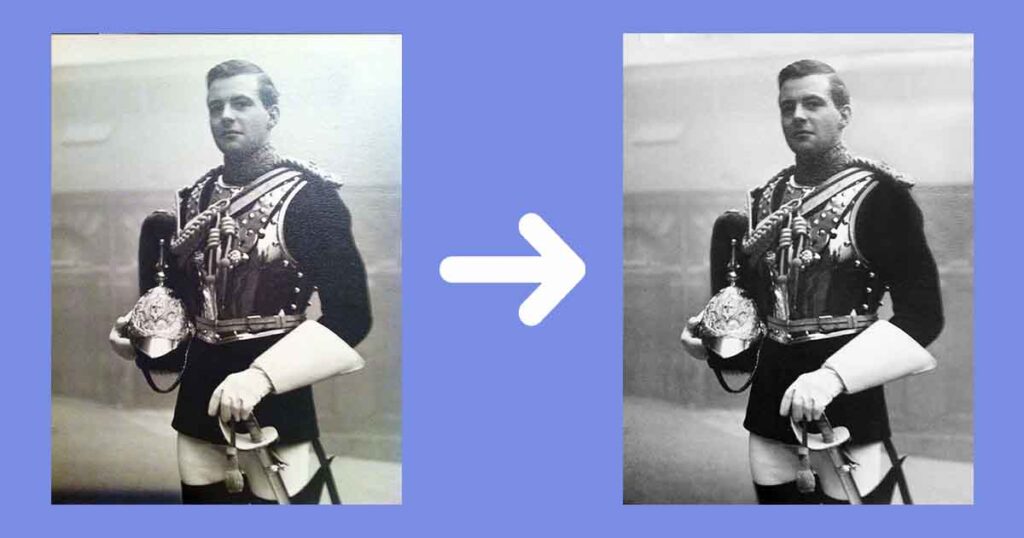
To avoid the need of doing such fixes you can learn how to make perfect scans of your old photos using only your phone or camera.
Popular issues are:
- Shadows cast by the camera, phone, you, or objects in the vicinity
- Highlights from the sun, flash, lamp, and other sources
- Reflections of the surroundings on the surface of a photograph, glass frame, or album
If none of these problems are severe, you can easily correct them with adjustment layers such as Curves and Clone or Healing Brush Tools.
To remove highlights, shadows, or reflections, follow these steps:
- Create a new Curves Adjustments layer and select it by clicking on the new layer’s Curves icon.
- Drag the curve to the right to remove shadows and the curve to the left to remove highlights. Feel free to go a little crazy with it, because we will carefully paint it back.
- Select the Brush tool and set the flow to about 6% (we’ll go over this in more detail later).
- Select the layer mask by clicking on it in the layers panel, then press Ctrl + I to invert the mask and make it black.
- Begin by painting it over areas that have shadows or highlights with a Brush tool and white color.
- Draw it carefully, focusing more on areas that require more changes and less on areas that are already close to the original.
- After finishing, turn it on and off several times to ensure that it looks good. If you went too far, simply paint this area of the mask black to partially undo it.
- Simply create a New Layer and use the Clone Stamp and Healing Brush tools to fix any remaining issues in these areas.
Done! These changes should be easy to implement, but they will definitely make a huge difference.
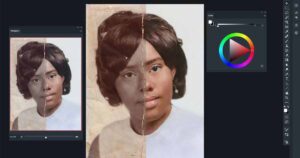
2. Place a Colored Photograph On Top of It
You should now add the photo that you colored with your preferred photo colorization AI. You can do this by going to File – Place Embed, or by dragging and dropping the image inside this PSD file, which is much easier and more convenient.

Note: to add this photo to this project, please drag and drop it into the Photoshop canvas (the active working area of the current file). Otherwise, it will be launched as a separate project. You can still copy files from there, but it will be a waste of time.
3. Stretch it to Match the Size of The Original Photo
This step is only important if you decided to go with free colorized copy of the image, since paid copies are HD, so size of them will be the same as original or bigger.
Why we need to stretch and fit this photo?
You should now include the photo you colored with your preferred photo colorization AI. You can do this by selecting File – Place Embed or by dragging and dropping the image into this PSD file, which is much easier and more convenient.
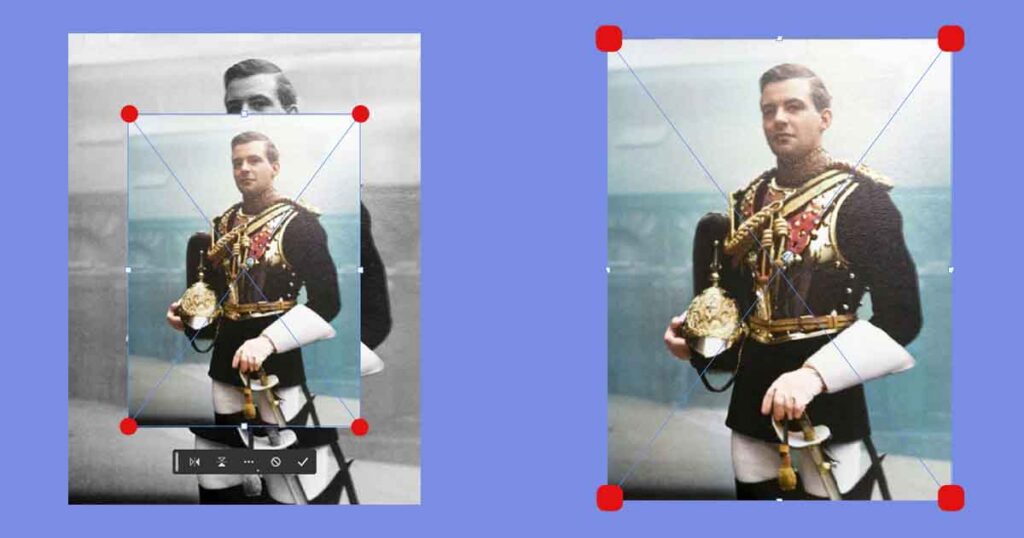
Drag and drop this photo into the Photoshop canvas (the active working area of the current file) to add it to this project. It will otherwise be launched as a separate project. It is still possible to copy files from there, but it will be a waste of time.
Match the corners
The simplest method is to simply match the corners of the layer with colorization details to the original one. It’s simple, just follow these steps:
- In the Layer Tab, select the layer with colorization.
- To enable the Free Transform tool, press Ctrl + T (or go to Edit – Free Transform).
- Zoom in by pressing Alt + Mouse Wheel.
- Drag any of the four corners you see to exactly match the original photo corner (for example, drag the top left corner of the colorization layer to match the top left corner of the original layer).
- Repeat the same action with the opposite diagonal corner (for example, if you dragged the top left corner in the previous step, you will need to drag the bottom right in this step).
- When you’re finished, press Enter to confirm it.
It’s as simple as that. After that, toggle the layer on and off several times to ensure that it matches the original layer. If not, simply repeat the preceding steps until it is perfect!
If it’s exactly where it needs to be, so that turning the layer on and off just adds color but no pixels move, you’re good to go!
4. Switch Blending Mode from Normal to Color
All that remains is to change the layer’s blending mode from Normal to Color. This will allow us to make only color-related details visible on the current layer, and nothing else.
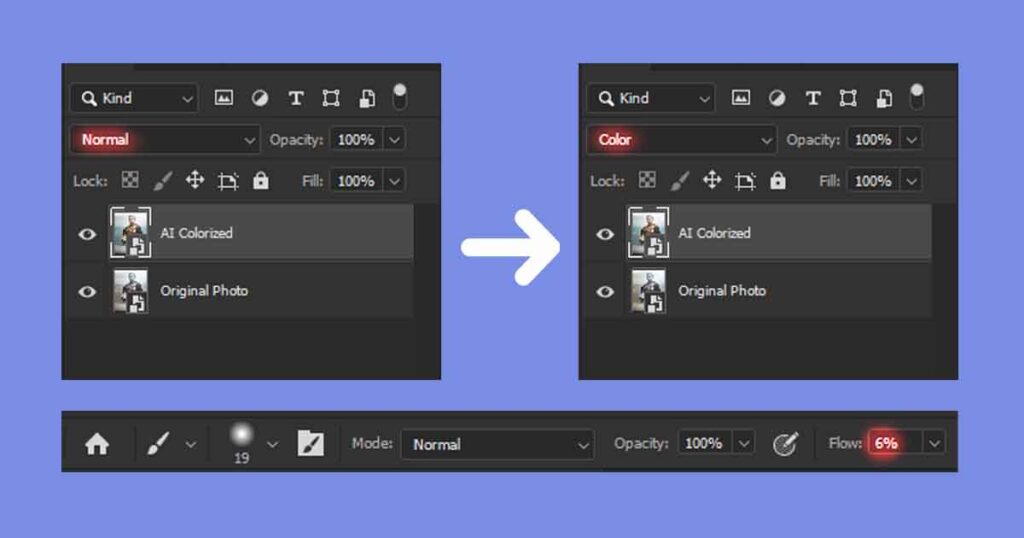
Before we can address AI colorization issues, we must first properly configure our brush.
Setting up your brush for colorization
Setting up brush for photo colorization it is actually easy task.
- If you have a graphic tablet; It will work perfectly. You don’t need to change anything if it uses brush pressure information even with the default settings.
- If you use a mouse: We will make a few minor changes that will allow you to work very similarly to those who use a graphic tablet.
There are few changes you need to make:
- Flow: When the Brush tool is active, you can see this value in the top panel. Set the flow rate to 2-5%. Flow assists in simulating the pen pressure of a graphic tablet.
- Opacity: Never change it while colorizing photos; it will ruin the look of the photo and cause it to appear blotchy. Keep your brush opacity at 100% at all times and never change it.
With this, we should be ready to finally actually work on the photo!
5. Create a New Layer and Start Fixing Issues
Create a New Layer on top of that layer and change its blending mode to color. We will use it to fix any problems that may arise as a result of AI colorization, but first we must understand what these problems are, how to spot them, and why they must be fixed!
Main issues of AI colorization and how to deal with it
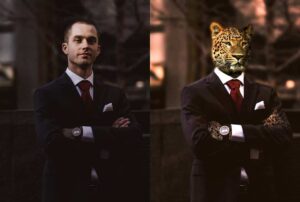
When it comes to photo colorization, there are several key details that you will need to correct after AI coloring with special attention. It will help you to drastically improve the beauty and accuracy of your AI colorized photo, especially if it was used to colorize a person!
But, if you will miss or neglect improving these small details after automatic colorization, you will get noticeably lower quality result, and while most people would not be able to tell what is wrong, photo will feel off.
Let’s discuss what are the most important details to check after AI and how to fix them after spotting issue.
Fixing careless borders and color stains
It is not technically a details itself, but it is very important concept that will make huge difference of how your final result photo looks.
Examples of accidentally colorized parts of the photo:
- While coloring my hair, accidentally colored a portion of the blue background brown.
- While colorizing lips, accidentally colored my teeth red.
- While colorizing jeans, accidentally colored a white shirt blue.
- Spotting and fixing spots or stain of random color
If you find these, or any other carelessly colored details, please correct them as soon as possible. These mistakes may not seem like a big deal when there are only one or two of them, but they add up quickly and can easily ruin the look of your image.
How to fix issues with colorization?
It is simple. All you have to do is take colors from areas that already look good and use them to colorize other areas.
Here are the exact steps to take:
- Make a New Layer
- By pressing B, you can access the Brush tool.
- Choose a color from the area that was correctly colored by AI.
- Carefully draw over areas that were incorrectly colored.
- If you made a mistake, you can fix it by:
- Undoing the previous step (Ctrl + Z), manually recoloring on top,
- Using an eraser to remove this area only from the current layer,
- Removing the entire layer and starting over
- Repeat for each problem you discover.
That’s all. This is a time-consuming and relaxing process, but it is not difficult or stressful, so take your time.
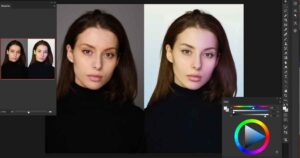
6. Fix any imperfections
Amazing. Hopefully, you used the information from the previous step to identify and correct any flaws in the colorized photo. Now, the best thing you can do is take a 5-minute break and then return to it to see some issues that you previously couldn’t see because your eye became accustomed to it.

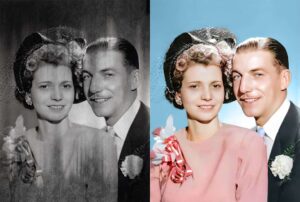
All of the differences you see above were achieved by implementing some manual photo restoration and manual photo colorization techniques, so check out these links if you want to learn how to do such improvements yourself.
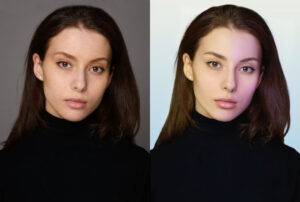
You can easily spot and eliminate them now that you have a clearer vision! You can also change the colors of details that you believe should be a different color at this stage!
For example, in this case, we changed the color of his tie, carnation flower, chair, suit and background. We also changed his skin tone to make it look more natural. All of these changes are optional, so don’t feel overwhelmed, but if you want to experiment, go ahead; you can easily undo them as long as you used New Layer!
7. Done
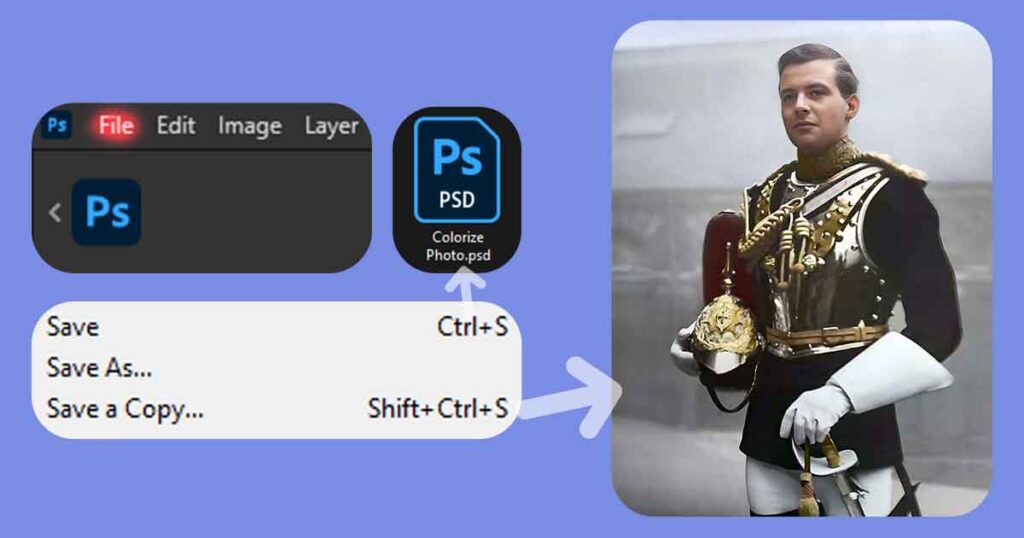
That’s all, congratulations! You successfully colorized a photo with AI and then manually enhanced it to look fantastic! You can now save a file by going to File – Save As A Copy, entering a name, and selecting JPEG or PNG as the format.
Also, go to File – Save (Ctrl + S) and save the PSD file, your Photoshop project file, so you can go back and make changes in the future!
You did it! Congratulations, and enjoy a well-deserved rest. Feel free to try this approach with any other photos you’d like to colorize to put yourself and your knowledge of photo colorization to the test, or to learn more about manual photo colorization with Photoshop and the theory behind it!
If you enjoy doing manual edits to your photos, try a photo restoration tutorial in Photoshop! If you require assistance from photo restoration and colorization experts, simply request a free quote to learn what we can do to restore and colorize your photo!
Let Us Colorize Your Photos
✔ Professional Photo Colorization
✔ Fast Delivery (1-4 Business days)
✔ Low Price Without Taxes or Fees
✔ Unlimited Free Revisions
✔ Satisfaction Guarantee
LEARN MORE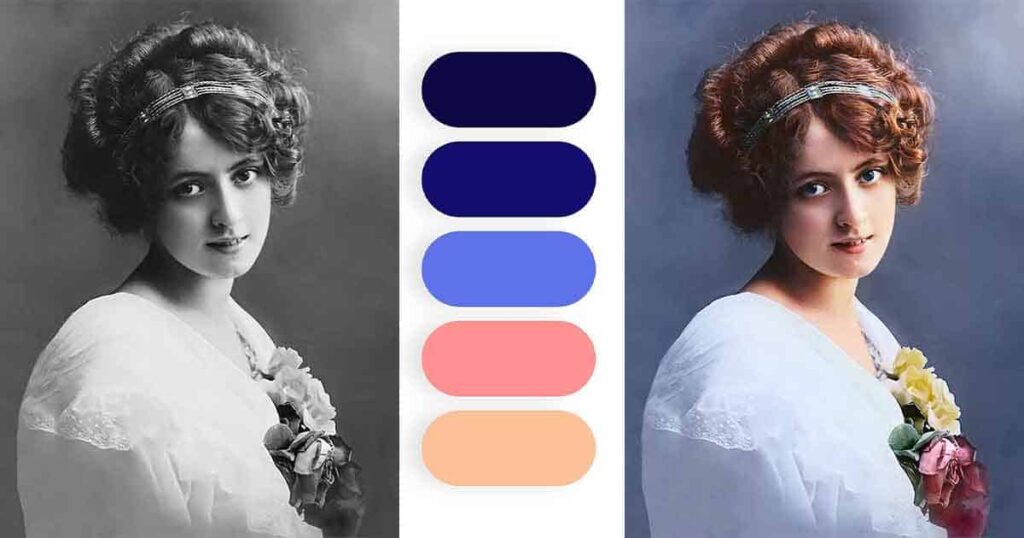
Subscribe to Newsletter


Comments are closed.